 Save to Pinterest
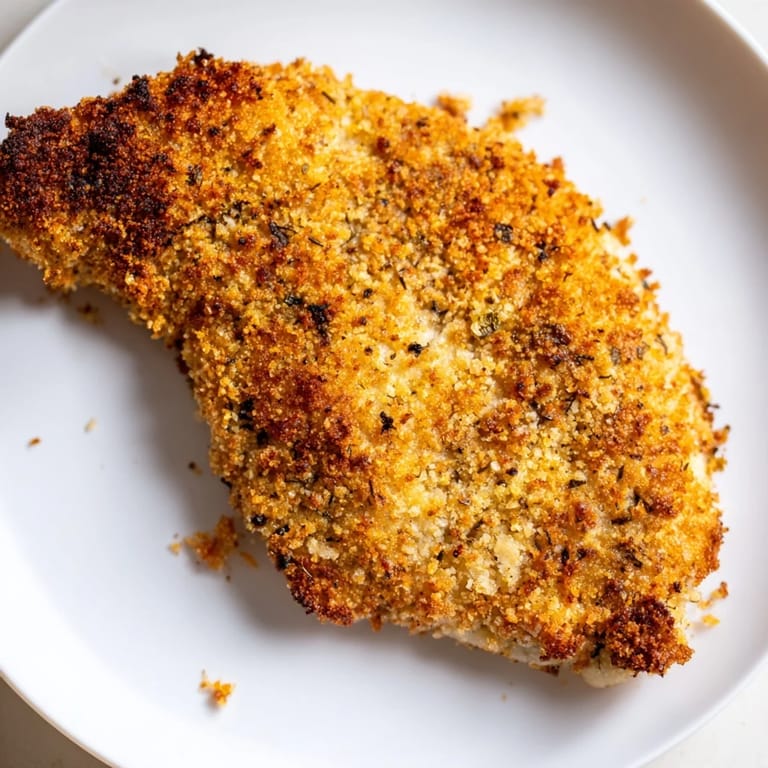
 There's something magical about the sound of chicken hitting hot air in the fryer—that immediate sizzle that tells you everything's about to turn golden. I discovered this method by accident one weeknight when I was craving crispy chicken cutlets but didn't want the mess of a stovetop oil bath. The air fryer became my secret weapon, delivering that perfect crunch without the guilt or the grease stains on my stovetop. Now it's the first thing I reach for when I want restaurant-quality results in under thirty minutes.
I made these for my sister last month when she was stressed about feeding her kids something healthy, and watching them actually ask for seconds was worth every minute of prep. She's now convinced the air fryer is a necessity, not a gadget, and honestly I can't argue with her.
Ingredients
- Boneless, skinless chicken breasts: Four medium ones (about 1.5 pounds) are the foundation—pound them thin so they cook evenly and stay tender inside.
- All-purpose flour: One cup creates the first adhesive layer that keeps everything stuck together through the cooking process.
- Eggs and milk: Two eggs beaten with two tablespoons milk form the binding agent that makes the breadcrumbs cling to the chicken instead of falling off.
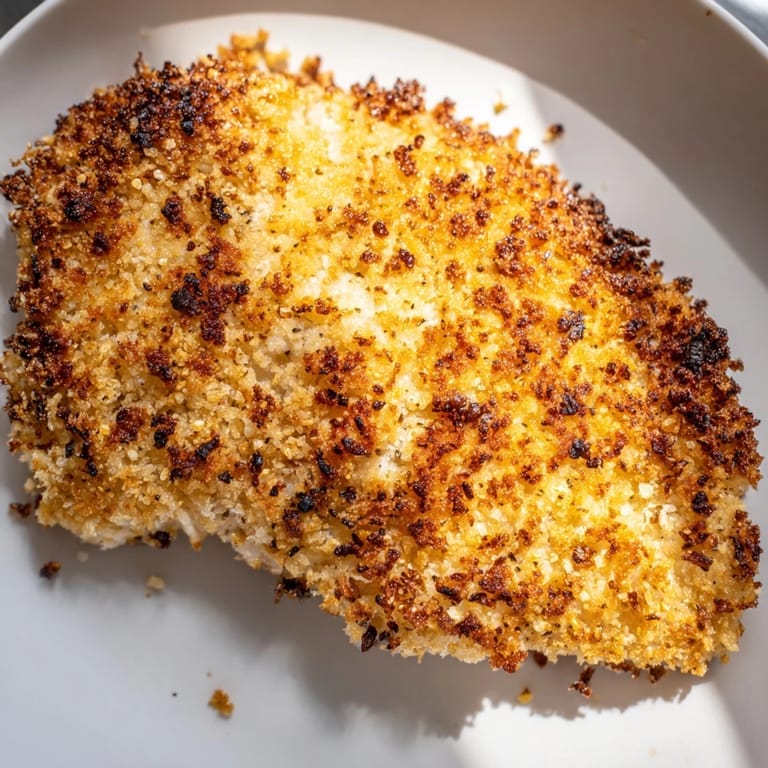
- Panko breadcrumbs: One and a half cups give you that authentic crispy texture—regular breadcrumbs make it dense, but panko stays light and crunchy.
- Parmesan cheese: Half a cup grated adds savory depth that makes people ask what your secret ingredient is.
- Garlic powder, onion powder, and smoked paprika: One teaspoon garlic, one teaspoon onion, and half teaspoon paprika season the coating so you don't need a dipping sauce (though lemon wedges don't hurt).
- Salt and black pepper: One teaspoon salt and half teaspoon pepper—taste as you go because the Parmesan adds saltiness too.
- Olive oil spray: This is what creates the crispy golden exterior; don't skip this step or you'll get pale, disappointing cutlets.
Tired of Takeout? 🥡
Get 10 meals you can make faster than delivery arrives. Seriously.
One email. No spam. Unsubscribe anytime.
Instructions
- Preheat and prepare:
- Set your air fryer to 400°F and let it heat for five minutes—this matters because a cold basket means soggy bottoms. While it warms, grab your chicken and place it between two sheets of parchment paper.
- Pound the chicken:
- Using a meat mallet, pound each breast to about half an inch thick—you'll hear the satisfying thud as the meat flattens and feels more tender under your hands. Even thickness means even cooking, which is everything here.
- Set up your breading station:
- Arrange three shallow bowls in a line: flour in the first, beaten eggs mixed with milk in the second, and the breadcrumb mixture in the third. This assembly-line approach keeps your hands from getting too messy and prevents clumps.
- Coat each cutlet:
- Take one chicken breast, dredge it in flour first (shaking off excess), then dip it in the egg mixture, then press it firmly into the breadcrumb mixture, making sure every surface is covered. The pressing part is crucial—you want the coating to stick, not just dust the surface.
- Spray with oil:
- Place each breaded cutlet on a plate and spray both sides lightly with olive oil spray—light is the key word, as too much creates greasiness instead of crispiness. You're looking for a fine mist that coats the breadcrumbs evenly.
- Arrange and fry:
- Lay the cutlets in a single layer in your air fryer basket without overlapping—if they're crowded, they steam instead of fry, so work in batches if needed. Air fry for seven to eight minutes until the bottom is golden.
- Flip and finish:
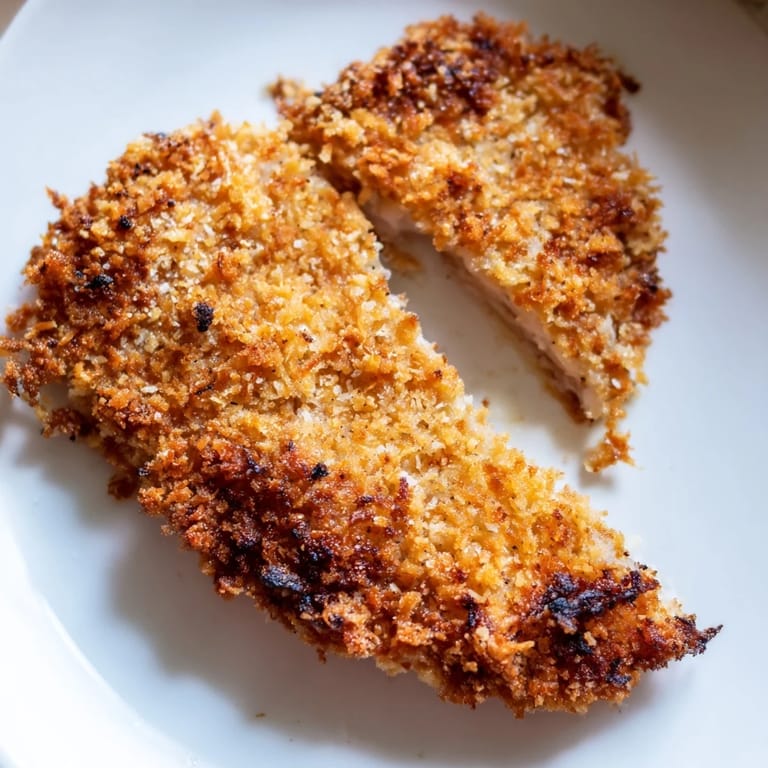
- Use tongs to gently flip each cutlet, spray the cooked side again, and continue cooking for another six to seven minutes until the second side is golden and the internal temperature hits 165°F when you test it with a thermometer. This is the moment where it all comes together—crispy outside, juicy inside.
- Rest and serve:
- Let the cutlets sit for two minutes on a plate before serving—this resting period keeps the juices inside the chicken instead of running onto your plate.
 Save to Pinterest
 There's a moment right before serving when the kitchen smells like garlic and bread and something special, and everyone comes to the table already hungry. That's when I know this recipe did exactly what it's supposed to do—bring people together with something crispy and satisfying.
Flavor Variations That Work
The breading mixture is a canvas for whatever flavors you're craving that day. I've added fresh basil and parsley to the breadcrumb mixture and gotten compliments, or swapped the paprika for cayenne pepper when I wanted heat. You can even add a tablespoon of Italian seasoning, or go simple and just use the garlic and onion powder. The beauty is that the chicken stays tender while the coating takes on whatever personality you give it.
Serving Ideas and Pairings
I serve these with a simple lemon wedge because the acidity cuts through the richness, but marinara sauce, ranch, or even a sriracha mayo work beautifully. A crunchy salad or roasted vegetables on the side makes it feel like a complete meal without requiring much extra work. My favorite combo is crusty bread, a wedge of fresh mozzarella, and these cutlets piled into a sandwich, which is honestly more satisfying than it has any right to be.
Storage and Reheating
Leftovers stay crispy in an airtight container in the fridge for up to three days, and you can reheat them in the air fryer at 350°F for about five minutes to restore that golden crunch. Cold cutlets are also excellent in salads or sandwiches the next day if you're into meal prep. The texture never quite bounces back to fresh, but it stays miles better than oven-reheated fried chicken.
- Freeze unbaked, breaded cutlets on a baking sheet for up to three months, then cook directly from frozen (add a couple minutes to the cooking time).
- Store the breaded cutlets separately from sauce if you plan to save them, or they'll get soggy by the next day.
- If you batch-cooked and some are cooling, keep them on a wire rack instead of a plate so steam doesn't make the bottom soft.
 Save to Pinterest
 This recipe has become my go-to for when I want to feel accomplished without spending all evening in the kitchen. Once you master the technique, you'll find yourself making it constantly.
Questions & Answers
- → How do I achieve extra crispiness?
Using panko breadcrumbs combined with a slight spray of olive oil before air frying helps create a golden, crisp texture.
- → Can I use different coatings instead of panko?
Yes, alternatives like crushed cornflakes or gluten-free breadcrumbs work well while maintaining a crunchy crust.
- → How do I ensure the chicken cooks evenly?
Flattening the chicken breasts to an even thickness guarantees consistent cooking and juicy results inside.
- → What temperature should I set the air fryer to?
The air fryer should be preheated to 400°F (200°C) to cook the cutlets quickly while developing that appealing golden color.
- → Are there seasoning options to customize the flavor?
Adding fresh herbs like parsley or basil to the breadcrumb mixture or serving with lemon wedges boosts brightness and flavor.