 Save to Pinterest
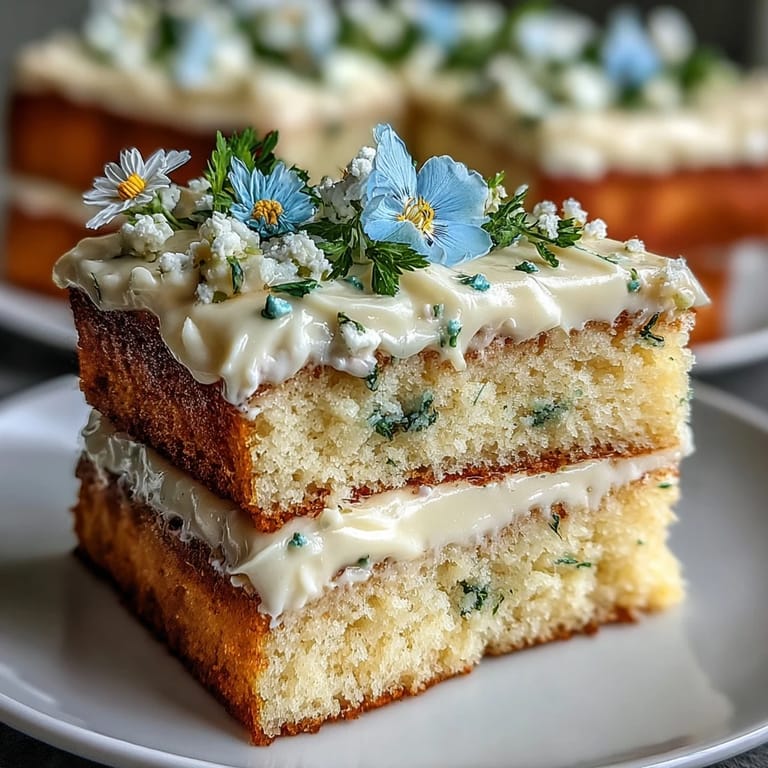
 My sister called me three weeks before her birthday asking if I could make her a cake, and something about the way she said it—half hopeful, half expecting me to say no—made me want to try something I'd never done before. I'd baked plenty of sheet cakes and cupcakes, but never a proper layered cake with piped flowers. The night before her party, I found myself standing in my kitchen at eleven o'clock, buttercream on my apron, pastel pink and lavender oozing from piping bags like I actually knew what I was doing. Turns out, I kind of did.
The memory I treasure isn't the final cake sitting perfect on the dessert table—it's my nephew asking if the flowers were real, and my mom laughing so hard she had to sit down when I explained I'd piped them by hand. That's when I realized this recipe isn't about impressing people with technique; it's about making something beautiful enough that it startles you a little when you step back and look at what you created.
Ingredients
- All-purpose flour (2 ½ cups): Measure by spooning into a cup and leveling off—scooping directly can pack too much flour and make your cake dense and dry.
- Baking powder (2 ½ tsp): This is what gives the cake its tender crumb, so don't skimp or use old powder that's lost its lift.
- Salt (½ tsp): Sounds small but it awakens the vanilla and balances sweetness in ways you'll taste without knowing why.
- Unsalted butter (1 cup for cake, 1 ½ cups for frosting): Room temperature butter creams properly and incorporates air; cold butter will frustrate you.
- Granulated sugar (2 cups): White sugar dissolves cleanly into the batter, creating that fine, delicate crumb texture.
- Eggs (4 large): Room temperature eggs emulsify better with the butter and create a more tender cake.
- Pure vanilla extract (1 tbsp for cake, 2 tsp for frosting): Real vanilla is worth it here because it's the only strong flavor competing with the buttercream.
- Whole milk (1 cup for cake, ¼ cup for frosting): The milk loosens the batter so it bakes evenly without becoming tough.
- Powdered sugar (6 cups for frosting): Sift it first—lumpy sugar means lumpy, grainy buttercream no matter how long you beat it.
- Gel food coloring: Gel holds its color better than liquid; a tiny drop goes far, and pastels come out soft and dreamy.
- Edible flower petals and sprinkles (optional): These are the moment where your cake stops being cake and becomes decoration.
Tired of Takeout? 🥡
Get 10 meals you can make faster than delivery arrives. Seriously.
One email. No spam. Unsubscribe anytime.
Instructions
- Prep your pans and preheat:
- Set your oven to 350°F and line three 8-inch round pans with parchment paper—this step prevents sticking and means you can turn layers out cleanly. Use a dab of batter under each paper circle to keep it from shifting while you pour.
- Dry ingredients unite:
- Whisk flour, baking powder, and salt together in a medium bowl until they look evenly distributed. This prevents lumps from hiding in your batter.
- Cream butter and sugar until clouds:
- Beat room temperature butter with sugar on medium-high speed for 3 to 4 minutes until it's pale, fluffy, and noticeably lighter—this traps air bubbles that make your cake tender. Stop occasionally and scrape the bowl sides.
- Add eggs one at a time with patience:
- Each egg needs a full 30 seconds of beating to incorporate before the next one arrives. This slower approach prevents the mixture from breaking and ensures even distribution.
- Vanilla goes in now:
- Mix in the vanilla extract after your last egg is fully incorporated; it takes just a few seconds.
- Alternate flour and milk, begin and end with flour:
- Add a third of the flour mixture, mix gently, then half the milk, then another third flour, then the remaining milk, then the final flour third. This pattern prevents overmixing and keeps the batter tender—stop as soon as streaks disappear.
- Divide and smooth:
- Split batter evenly among three pans and smooth the tops with an offset spatula so they bake level and even.
- Bake until golden and set:
- Bake 25 to 30 minutes until a toothpick comes out clean and the top springs back when touched. Your kitchen will smell like birthday before the timer goes off.
- Cool with intention:
- Let cakes rest in pans for 10 minutes so they set slightly, then flip onto wire racks to cool completely. Trying to frost a warm cake is a lesson learned the hard way.
- Make buttercream clouds:
- Beat softened butter until creamy, then gradually add sifted powdered sugar a cup at a time, scraping the bowl between additions. Once combined, add milk, vanilla, and salt, then beat 3 to 4 minutes until it's fluffy and light like the frosting in your dreams.
- Color your dreams:
- Divide buttercream into separate bowls and add gel coloring drop by drop—pastels mean restraint, so start with one drop and mix well before deciding you need more.
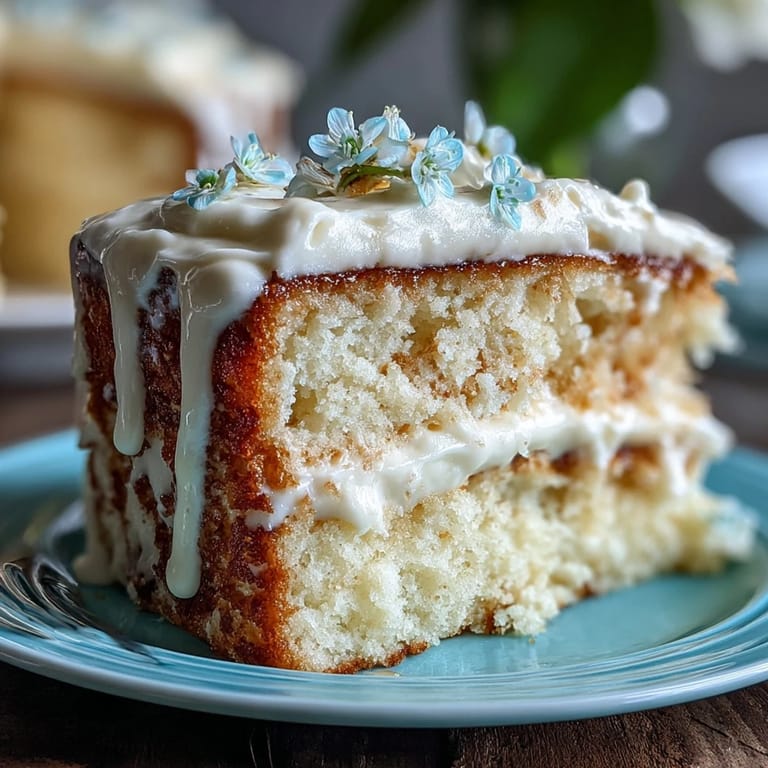
- Stack and crumb coat:
- Place the first cake layer on your plate, spread buttercream on top, repeat with layers, then apply a thin crumb coat over the entire cake to trap any loose crumbs. Chill 20 minutes so this foundation sets.
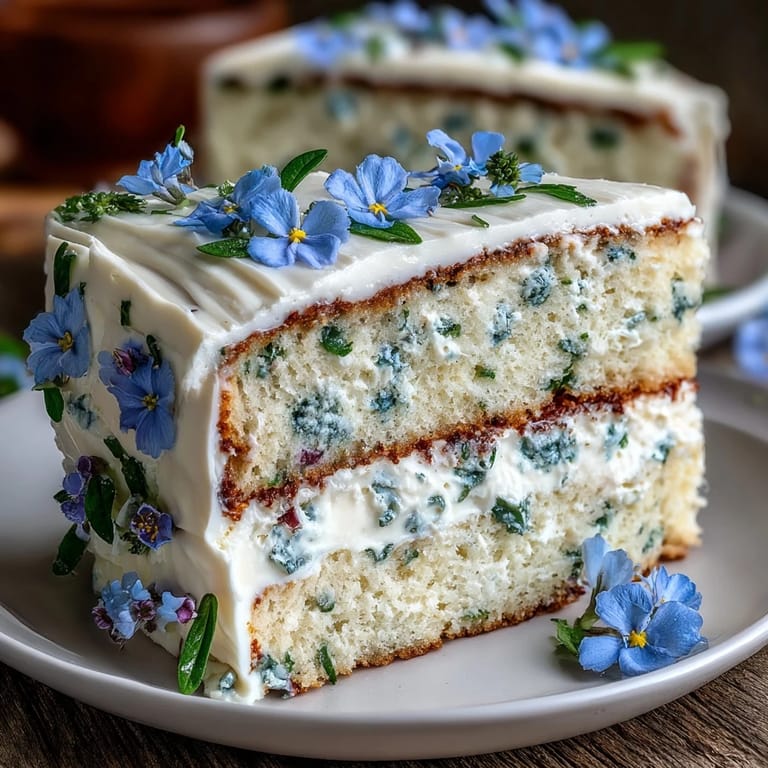
- Pipe your flowers:
- Using piping bags with rose, petal, or leaf tips, pipe pastel buttercream directly onto the cake in whatever floral pattern feels right. There's no one way to do this—that's the beauty.
- Final chill and serve:
- Chill the finished cake 15 to 20 minutes so the buttercream sets before slicing, and watch people's faces when they see what you made.
 Save to Pinterest
 Three days after the party, my sister texted me a photo of the cake slice sitting on her dessert plate, and I realized the real gift wasn't the cake itself—it was knowing that I'd made something beautiful enough to photograph and remember. She's asked me to make it for every birthday since.
Why Room Temperature Matters More Than You Think
The first time I made this cake, I was impatient and grabbed eggs and butter straight from the fridge because I didn't want to wait. The batter looked separated and grainy, and I nearly threw it away thinking something had gone wrong. What actually went wrong was me rushing. Cold butter won't trap air properly when you cream it, and cold eggs won't emulsify into that butter, so you get a curdled-looking mess instead of a smooth, fluffy base. Now I pull everything out an hour before baking and let it sit on the counter while I organize my workspace—it's the easiest way to guarantee success.
The Gentle Art of Not Overmixing
Overmixing is the silent killer of tender cake, and I learned this by making a dense, tough cake that tasted like disappointment when I was determined to beat the batter into absolute submission. The flour contains gluten, and the more you mix after adding it, the more those gluten strands develop and tighten, turning your cake into something that should come with a dentist recommendation. Once you've added the final portion of flour, mix only until you don't see white streaks anymore—fifteen to twenty seconds, maybe thirty if you're being cautious. Your instinct will tell you to mix more, and you have to ignore it.
Piping Flowers Without Panic
The buttercream piping part sounds intimidating until you realize that pastel colors forgive imperfection beautifully—slightly wonky roses still look romantic, and uneven petal work just looks textured and natural. I watched online tutorials and practiced on parchment paper the day before, which calmed my nerves enough to actually enjoy the process. If you mess up a piped flower, you can smooth it out with an offset spatula and try again without starting over. The chilled cake is your practice surface, and practice is exactly what you're doing.
- Fit your piping bag with a rose tip or petal tip and fill it only halfway so you can control pressure and movement.
- Hold the bag at a 45-degree angle and let the buttercream do the work—you're guiding, not forcing.
- If a flower looks wrong, smooth it gently with a warm offset spatula and pipe over it; no one will know.
 Save to Pinterest
 This cake exists at the intersection of technique and joy, looking fancy enough to impress but forgiving enough to not punish you for being human. Make it for someone you love, or make it for yourself and take photos before anyone eats it—you earned that moment.
Questions & Answers
- → What type of flour is best for this cake?
All-purpose flour provides the right structure while keeping the cake tender and soft.
- → How can I achieve smooth pastel colors in the buttercream?
Use gel food coloring sparingly and blend thoroughly into the buttercream for even, soft pastel shades.
- → What’s the best method to keep cake layers moist?
Alternating flour mixture and milk during mixing and avoiding overmixing helps maintain moisture and a tender crumb.
- → Can this cake be prepared ahead of time?
Yes, the cake layers and buttercream can be made in advance; store layers wrapped and chilled, and assemble before decorating.
- → How should I store this cake after decorating?
Keep the decorated cake refrigerated to set the buttercream, then bring to room temperature before serving.