 Save to Pinterest
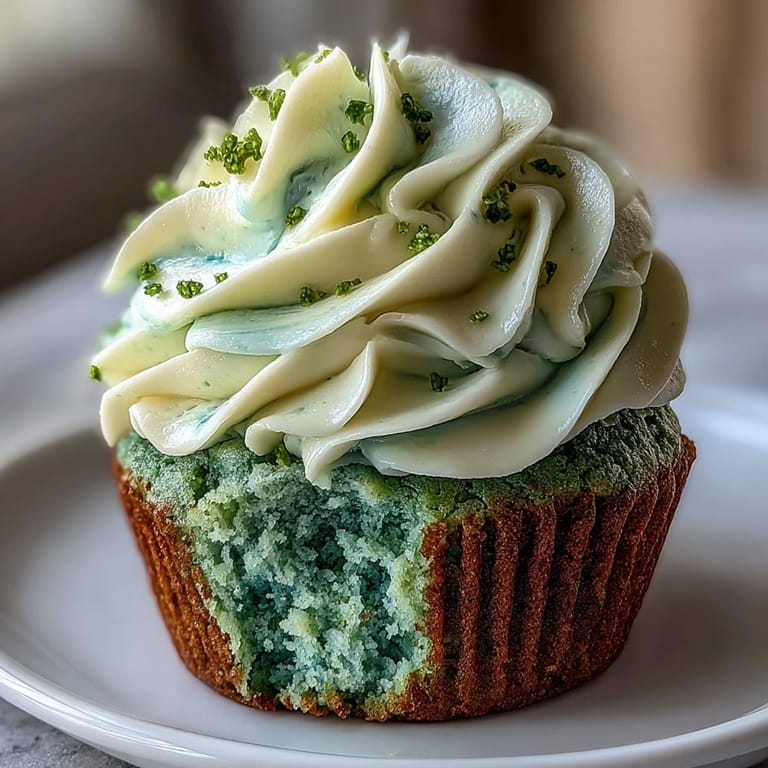
 My coworker Sarah brought these to the office St. Patrick's Day potluck, and I watched people's faces light up when they bit into one—the shock of seeing green velvet cake with that subtle cocoa undertone was pure magic. The vanilla frosting on top was so creamy it practically melted on your tongue, and suddenly everyone wanted the recipe. What started as her attempt to make something festive without all the food coloring mess turned into the dessert everyone now requests by name.
I remember making a batch for my daughter's school party and she kept sneaking into the kitchen to watch them bake, saying the kitchen smelled like Christmas and spring at the same time. When she bit into one at the party, she grinned at me across the gymnasium—that tiny moment of pride made me realize baking for people is really just a quiet way of showing them they matter.
Ingredients
- All-purpose flour: Use the 160g weight if you have a scale, because scooping and leveling is where most people end up with dense cupcakes.
- Granulated sugar: This sweetens the batter and helps the cocoa shine through without making them taste like candy.
- Unsweetened cocoa powder: The secret ingredient that makes these taste like actual cake and not just food coloring, so don't skip it or substitute Dutch cocoa.
- Baking soda: This reacts with the vinegar to give you that tender crumb, so accuracy matters here.
- Buttermilk: Let it come to room temperature so it mixes smoothly with the oil and eggs without seizing up.
- Vegetable oil: Keeps everything moist and tender compared to butter alone; it's the ingredient that prevents dry cupcakes.
- Eggs: Room temperature eggs incorporate better and create a finer texture in the crumb.
- Vanilla extract: Use real vanilla if you can; the flavor profile actually makes a difference here.
- Distilled white vinegar: This sounds odd but it's crucial—it activates the baking soda and adds a subtle tang that balances the sweetness.
- Green gel food coloring: Gel won't water down your batter like liquid coloring does, so you get vibrant color without changing the texture.
- Cream cheese: Softened is non-negotiable for the frosting; cold cream cheese will be lumpy and impossible to work with.
- Unsalted butter: Lets you control the salt level and prevents overly salty frosting.
- Powdered sugar: Sift it before adding so you don't end up with lumps that are impossible to beat out.
Tired of Takeout? 🥡
Get 10 meals you can make faster than delivery arrives. Seriously.
One email. No spam. Unsubscribe anytime.
Instructions
- Get your station ready:
- Preheat the oven to 350°F and line your muffin tin with cupcake liners—this matters because cupcakes baked without liners won't release cleanly.
- Mix the dry team:
- Whisk together flour, sugar, cocoa powder, baking soda, and salt in a large bowl until the cocoa powder is evenly distributed with no streaks. This step prevents lumps later on.
- Blend the wet ingredients:
- In a separate bowl, whisk buttermilk, oil, eggs, vanilla, vinegar, and green food coloring until the color is completely uniform and the vinegar has dissolved. Don't skip the whisking step or you'll end up with streaks of color in your cupcakes.
- Combine gently:
- Pour the wet mixture into the dry ingredients and fold together with a spatula using just 12 to 15 strokes—overmixing develops gluten and makes dense cupcakes. Stop as soon as you don't see any white flour streaks.
- Fill the liners:
- Divide batter evenly, filling each liner about two-thirds full so they rise nicely without spilling over.
- Bake with confidence:
- Bake for 16 to 18 minutes until a toothpick inserted in the center comes out with just a few moist crumbs—the cupcakes will continue cooking slightly as they cool. If the tops feel firm when you touch them gently, they're done.
- Cool properly:
- Let them sit in the pan for 5 minutes to firm up, then transfer to a wire rack so they cool completely and don't sweat condensation that makes them soggy. Completely cool cupcakes are essential before frosting or it will melt.
- Make the frosting magic:
- Beat softened cream cheese and butter for about 2 minutes until fluffy and pale, then gradually add sifted powdered sugar while beating so it incorporates smoothly. Add vanilla and beat until you have clouds of frosting that hold soft peaks.
- Frost with intention:
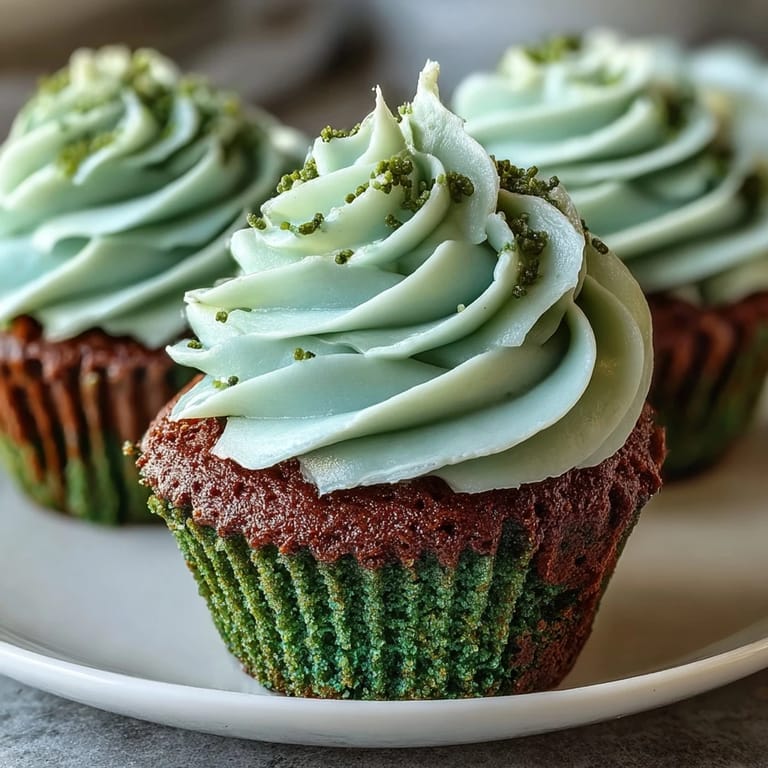
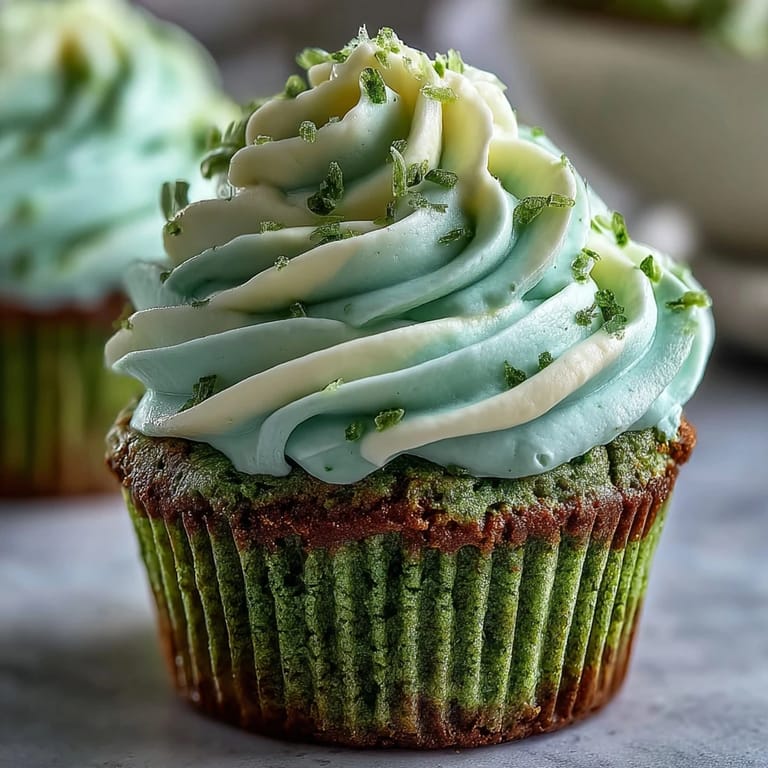
- Once cupcakes are completely cool, frost generously using a spatula for a rustic look or a piping bag if you want peaks and swirls.
- Add the finishing touch:
- Sprinkle with green sprinkles or place a shamrock candy on top while the frosting is still soft so it sticks.
 Save to Pinterest
 There's something about serving a cupcake that's an unexpected color—the way people pause for a second before taking a bite, then their whole expression shifts when the chocolate and vanilla frosting hit their taste buds. It's like a tiny moment of joy you get to hand someone.
The Green Velvet Difference
Traditional red velvet cake gets its reputation from cocoa, vinegar, and cream cheese frosting—not actually from the color itself. Green velvet works the exact same way, which is why these taste like real cake and not just food coloring on something generic. The cocoa powder adds earthiness and depth that balances the sweetness of the frosting, and the buttermilk keeps everything tender and moist even after a few days.
Storage and Make-Ahead Strategy
You can bake these the day before and store them unfrosted in an airtight container at room temperature, then frost them the morning of your event—this actually works better because the cupcakes are more stable. The frosted cupcakes keep in the refrigerator for up to 4 days, though they taste best when brought to room temperature before serving.
Customizing Your Celebration
While these are perfect for St. Patrick's Day as written, I've made them for spring celebrations, baby showers, and even a weird green-themed birthday party by swapping the decorations. The base recipe is versatile enough that you could add a whiskey or Irish cream flavor to the frosting for adults, or keep it simple and let the cake speak for itself.
- If you want less chocolate flavor, reduce the cocoa powder to 3 tablespoons and add 2 more tablespoons of flour to keep the ratio right.
- For an extra special touch, pipe a small amount of cream cheese frosting into the center of each cupcake before filling the rest of the liner with batter.
- These freeze beautifully unfrosted for up to 2 months, which means you can have homemade cupcakes ready whenever you need them.
 Save to Pinterest
 These cupcakes remind me that celebrations don't need to be complicated to feel special. They're just a little proof that a straightforward recipe made with attention can brighten someone's whole day.
Questions & Answers
- → What gives the cupcakes their green color?
Green gel food coloring is used to achieve the vibrant green hue without altering the batter's consistency.
- → Can I substitute ingredients to make these dairy-free?
Yes, plant-based cream cheese, butter, and buttermilk alternatives can be used for a dairy-free variation.
- → How do I know when the cupcakes are fully baked?
Insert a toothpick into the center; it's done when the toothpick comes out clean without wet batter.
- → What frosting is used on these cupcakes?
A creamy vanilla frosting made from cream cheese, butter, powdered sugar, and vanilla extract tops the cupcakes.
- → Are there tips for decorating these cupcakes?
Decorate with green sprinkles or shamrock candies to enhance the festive St Patricks Day theme.
- → Can these cupcakes be paired with beverages?
They pair wonderfully with Irish coffee or a simple glass of milk for a complementary treat.