 Save to Pinterest
 The first time I made chicken katsu, I nicked my finger on the meat mallet and almost abandoned the whole project. But that tantalizing sizzle when the panko-coated cutlet hit the hot oil convinced me to push through. Standing in my tiny apartment kitchen, windows open to clear the frying aroma, I watched with satisfaction as the golden crust formed around juicy chicken. One bite of that perfect textural contrast – crispy exterior giving way to tender meat – and I was converted for life.
My friend Mei came over for dinner last spring and watched me prepare chicken katsu with amused skepticism, insisting her grandmother would never approve of my technique. By the end of the meal, she was photographing her empty plate to send to her family with the message that a non-Japanese friend had somehow mastered katsu. The gentle ribbing I received about my unorthodox flipping technique was worth every minute.
Ingredients
- Boneless skinless chicken breasts: The canvas for our crispy masterpiece – I prefer slightly larger breasts so I can pound them really thin, creating maximum surface area for that addictive crust.
- Panko breadcrumbs: These Japanese-style breadcrumbs are airier and crunchier than standard breadcrumbs, creating that signature light texture that makes chicken katsu so special.
- Vegetable oil: A neutral oil with a high smoke point is essential for achieving that perfect golden crust without any burnt flavors sneaking in.
- Worcestershire sauce: The secret umami backbone of proper tonkatsu sauce – I accidentally doubled it once and discovered it actually improved the depth.
- Mirin: This sweet rice wine adds that subtle complexity to the sauce that you cant quite place but would definitely miss.
Tired of Takeout? 🥡
Get 10 meals you can make faster than delivery arrives. Seriously.
One email. No spam. Unsubscribe anytime.
Instructions
- Pound your chicken:
- Place each breast between plastic wrap and gently pound to about a half-inch thickness, applying even pressure from the center outward. The satisfying rhythm of the mallet against the meat is oddly therapeutic after a long day.
- Set up your breading assembly line:
- Arrange your flour, beaten eggs, and panko in separate shallow dishes in that order. This might seem fussy, but having everything in position makes the process flow beautifully with minimal mess.
- Master the dry-wet-dry technique:
- Dredge each breast in flour, shaking off excess before dipping in egg, then press gently into the panko, ensuring complete coverage. Watch how the breadcrumbs stick to the egg-coated surface, transforming the pale chicken into something promising.
- Get that oil temperature just right:
- Heat oil until shimmering but not smoking, around 170°C if you have a thermometer. Drop a few panko crumbs in as a test – they should bubble immediately but not burn.
- Fry with patience:
- Lower each cutlet into the oil and resist the urge to move it for the first minute or so. Listen for that consistent gentle sizzle that tells you the temperature is perfect.
- Mix your magic sauce:
- Whisk together the sauce ingredients until smooth and well-blended. The aroma rising from this simple mixture will transport you straight to a Tokyo restaurant.
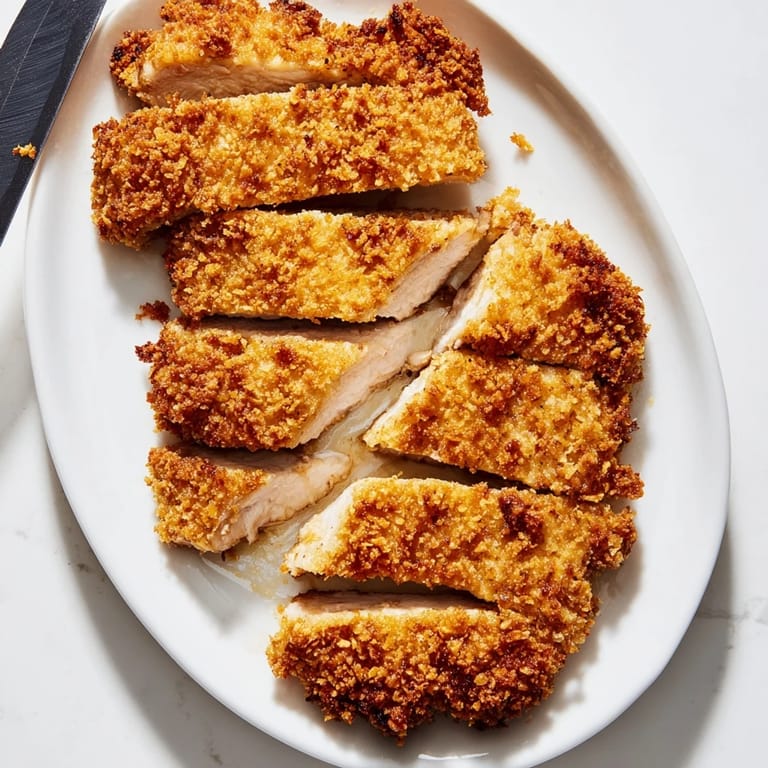
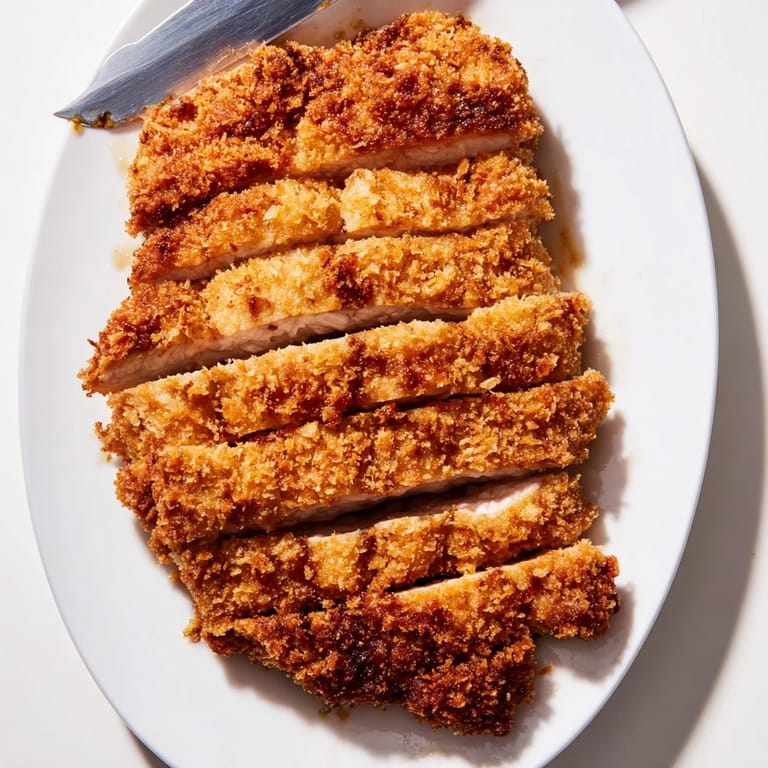
- Slice and serve with flair:
- Cut the katsu into strips across the grain and arrange alongside cabbage, lemon wedges, and a small dish of that glossy tonkatsu sauce. The presentation is half the experience – a neat row of golden cutlet strips just begging to be dipped.
 Save to Pinterest
 My partner claimed to dislike breaded chicken until I served this on our third date, along with cold Sapporo and a simple cabbage salad with sesame dressing. The look of surprise when he took his first bite – followed by the quiet focus of someone completely immersed in a meal – told me everything. We now celebrate our anniversary each year with chicken katsu, a ritual that brings us back to that moment when food bridged our differences.
Perfect Pounding Technique
After years of making chicken katsu, I discovered that uneven thickness is the enemy of perfect results. I now start pounding from the middle and work outward in a circular motion, checking frequently with my fingertips for any thicker spots. Some people go overboard with aggression here, but gentle, patient pounding preserves the integrity of the meat while still achieving that ideal thin cutlet that cooks evenly without drying out.
Elevating Your Panko Game
One summer evening when I was particularly ambitious, I tried toasting the panko in a dry pan before using it for breading. The resulting golden breadcrumbs created a next-level chicken katsu with enhanced nuttiness and even more spectacular crunch. Just watch them carefully and stir constantly, as they go from perfectly toasted to burnt in seconds. The extra five minutes this step requires pays off tremendously in the final product, especially when serving to guests who appreciate those little details.
Sauce Variations Worth Trying
The traditional tonkatsu sauce is perfect in its simplicity, but occasionally I venture into variations that have surprised even myself with their compatibility. A dash of grated apple adds natural sweetness and complexity that balances the sharpness of the Worcestershire sauce. Sometimes a tiny splash of rice vinegar brightens everything up wonderfully, especially alongside heavier side dishes.
- For a spicy kick, add a teaspoon of gochujang or sriracha to the tonkatsu sauce and watch how it transforms the entire experience.
- When serving to children or spice-sensitive guests, increasing the mirin or honey component creates a sweeter, more approachable sauce that still maintains the essential katsu character.
- Keep your sauce in a squeeze bottle for authentic Japanese restaurant presentation and easier control when drizzling over your golden cutlets.
 Save to Pinterest
 Whether served as part of a bento box lunch or as the star of your dinner table, chicken katsu brings that special combination of comfort and excitement that makes a meal memorable. Each crispy bite carries the promise of happiness – a simple pleasure that proves good food doesnt have to be complicated to be extraordinary.
Questions & Answers
- → How do I keep the chicken cutlets from drying out?
The key is pounding the chicken breasts to an even 1/2-inch thickness before breading. This ensures uniform cooking so the exterior becomes crispy while the interior stays juicy. Don't overcook—fry for 3-4 minutes per side until golden brown.
- → What's the ideal oil temperature for frying?
Maintain the oil at 170°C (340°F). Too hot and the coating burns before the chicken cooks through; too cool and the cutlets absorb excess oil, becoming greasy. Use a thermometer for accuracy.
- → Can I make tonkatsu sauce ahead of time?
Yes, the sauce keeps well in an airtight container for up to one week in the refrigerator. Whisk it together just before serving to ensure a smooth consistency.
- → What's the difference between panko and regular breadcrumbs?
Panko breadcrumbs are coarser and less densely packed than regular breadcrumbs, creating a crunchier, airier coating when fried. This is essential for achieving the signature crispy texture of chicken katsu.
- → Can I use pork instead of chicken?
Absolutely. Pork cutlets create tonkatsu, the traditional version. Use pork loin sliced 1/4-inch thick and follow the same breading and frying process. Cooking time remains 3-4 minutes per side.
- → How should I store leftovers?
Store cooled katsu in an airtight container in the refrigerator for up to three days. Reheat in a 180°C oven for 8-10 minutes to restore crispiness rather than using the microwave.