 Save to Pinterest
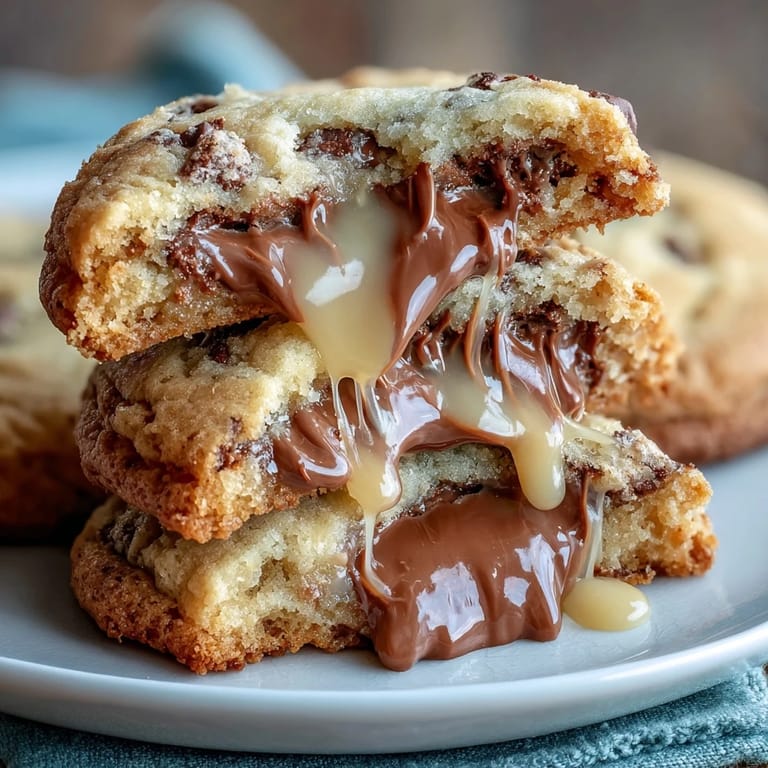
 My sister texted me a photo of a Cadbury Creme Egg with a mischievous caption: "What if this was inside a cookie?" I laughed it off until 3 AM when I suddenly couldn't stop thinking about it. The next morning, I raided my pantry, pulled out butter and chocolate chips, and decided to turn her joke into reality. What emerged from the oven was pure magic—a cookie that looked innocent on the outside but broke open to reveal that iconic gooey yellow center. Now every spring, these are the first thing people ask me to make.
I'll never forget watching my dad's face light up when he bit into one at Easter brunch—he actually stopped mid-conversation, which rarely happens. My mom immediately wanted the recipe, my niece demanded I make a batch just for her, and suddenly this happy accident became the unofficial dessert of our family gatherings. It's become shorthand now: when anyone says "bring those cookies," everyone knows exactly what we're talking about.
Ingredients
- Unsalted butter, softened (1 cup): Room temperature is absolutely crucial here—cold butter won't cream properly and you'll end up with dense cookies instead of chewy ones.
- Packed brown sugar (1 cup) and granulated sugar (½ cup): The brown sugar gives you that deep molasses flavor and chewy texture, while the white sugar helps them spread just enough.
- Eggs (2 large): Bring them to room temperature too; they'll incorporate better and create a more uniform dough.
- Vanilla extract (2 teaspoons): Use real vanilla if you can—it makes a noticeable difference in how the cookie tastes when warm.
- All-purpose flour (3 cups): Don't pack it down when measuring; spoon it in and level it off or you'll end up with tough cookies.
- Baking soda (1 teaspoon) and salt (½ teaspoon): These might seem small but they're what give the cookies that slight tang and help them brown beautifully.
- Semisweet chocolate chips (1½ cups): These are the workhorse here, but honestly, use whatever chocolate you love—dark, milk, even a mix.
- Mini Cadbury Creme Eggs (12), unwrapped and chilled: This is the star of the show, so chill them well in the freezer for at least an hour before you start.
Tired of Takeout? 🥡
Get 10 meals you can make faster than delivery arrives. Seriously.
One email. No spam. Unsubscribe anytime.
Instructions
- Get your mise en place ready:
- Preheat your oven to 350°F and line two baking sheets with parchment paper. This sounds fussy but it genuinely helps the cookies bake evenly and makes cleanup a breeze.
- Cream the butter and sugars:
- Beat your softened butter with both sugars until it's pale and fluffy, about 2 to 3 minutes—you'll see it transform from yellow to almost white. This step is where you're incorporating air into the dough, which makes cookies tender instead of brick-like.
- Add the eggs and vanilla:
- Crack in one egg, beat it until it's fully combined, then add the second one the same way. Finish with vanilla and mix just until it's all one cohesive mixture.
- Combine dry ingredients separately:
- In another bowl, whisk together your flour, baking soda, and salt—this distributes the leavening evenly so you don't get weird cookies that spread differently. It takes 30 seconds and makes a real difference.
- Bring it all together:
- Add the dry mixture to the wet mixture gradually, stirring gently until you don't see flour streaks anymore. Don't overmix or you'll develop gluten and end up with tough cookies instead of chewy ones.
- Fold in the chocolate:
- Gently stir in the chocolate chips until they're distributed throughout. This is the moment the dough starts to feel like the real thing.
- The crucial wrapping step:
- Scoop roughly 2 tablespoons of dough and flatten it into a small disk in your palm. Place one of those cold Cadbury eggs in the center, then carefully wrap the dough around it, pressing and sealing so no egg shows through—this is what keeps the magic inside.
- Space them properly on the sheet:
- Place each dough ball about 2 inches apart because they will spread a little and you don't want them baking into each other.
- Bake until golden:
- Bake for 12 to 14 minutes—you want the edges to be golden brown but the very center to still feel slightly soft when you gently press it. The cookies will continue to cook a bit on the hot pan after you pull them out.
- Cool with patience:
- Let them sit on the baking sheet for 5 minutes before transferring to a wire rack. This rest period is when they set just enough to move without falling apart.
 Save to Pinterest
 There's something genuinely special about creating a dessert that makes people pause mid-bite and say "wait, what?" These cookies do that every single time. They've become my go-to for when I want to impress someone with minimal effort disguised as maximum thoughtfulness.
The Art of Sealing the Egg
The wrapping is honestly the only part that feels fiddly, but once you do two or three you'll find your rhythm. Work with dough that's cold enough to handle but not so cold it cracks—if it warms up too much, pop it back in the fridge for a few minutes. The key is making sure absolutely no egg is visible through the dough, because even a tiny gap means chocolate is escaping into your cookie instead of staying tucked inside where it belongs.
Chocolate Chip Variations and Swaps
I've made these with dark chocolate chips, milk chocolate chips, and even a combination of both. Dark chocolate makes them feel more sophisticated, while milk chocolate keeps them fun and nostalgic. You could also try chopped chocolate bars or even white chocolate chunks if you're feeling adventurous.
Timing and Storage Wisdom
Make the dough ahead if you want—it keeps in the fridge for up to 3 days, though you'll need to let it soften for a few minutes before scooping. Baked cookies stay soft and delicious in an airtight container for about 3 days, though they honestly never last that long in my house.
- The 5-minute cooling time on the baking sheet is non-negotiable; it's what prevents them from falling apart when you move them.
- If you're making these for a party, bake them just before guests arrive so they're still warm and at peak deliciousness.
- A slice of bread in your cookie storage container actually keeps them from drying out—swap it out every day and it really works.
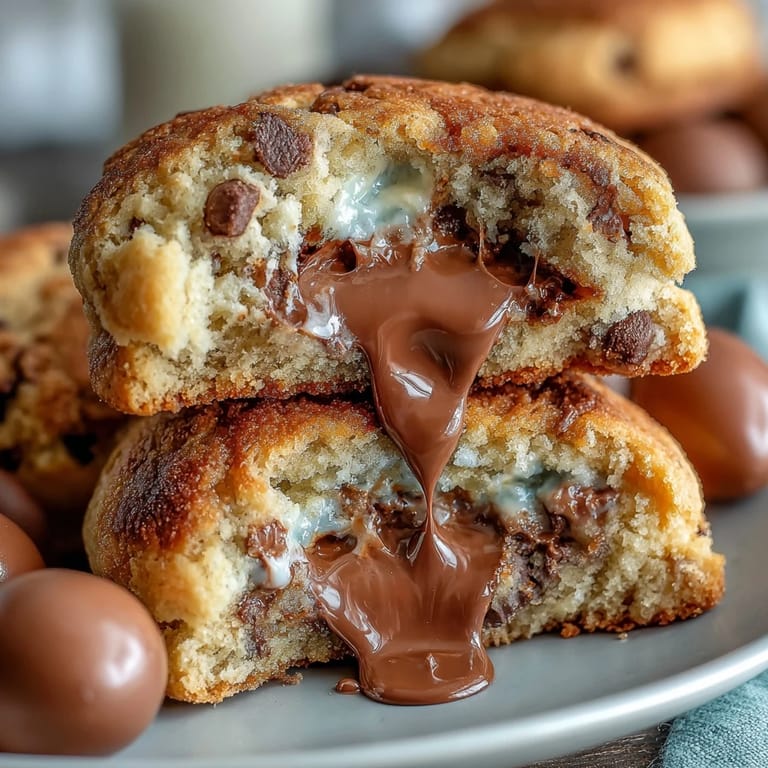 Save to Pinterest
 These cookies are pure joy in edible form—the kind of dessert that transforms an ordinary day into something worth remembering. Make them, watch someone's face when they discover the surprise inside, and you'll understand why they've become my favorite kitchen trick.
Questions & Answers
- → How do I prevent the Cadbury Eggs from melting too much during baking?
Chilling the Cadbury Creme Eggs before wrapping them in dough helps maintain their shape and prevents excessive melting in the oven.
- → What type of chocolate chips work best in these cookies?
Semisweet chocolate chips provide a balanced sweetness and complement the Cadbury eggs, but milk or dark chocolate chips can be used for variation.
- → Can I make the cookies ahead of time?
Yes, you can prepare and freeze the dough balls with the eggs inside, then bake from frozen by adding a couple of extra minutes to the baking time.
- → What is the ideal baking time for gooey centers?
Bake for 12-14 minutes until edges are golden but the centers remain slightly soft to ensure gooeyness around the Cadbury Eggs.
- → Are these suitable for vegetarians?
Yes, the cookies contain dairy and eggs but no meat products, fitting a vegetarian diet.