Save to Pinterest
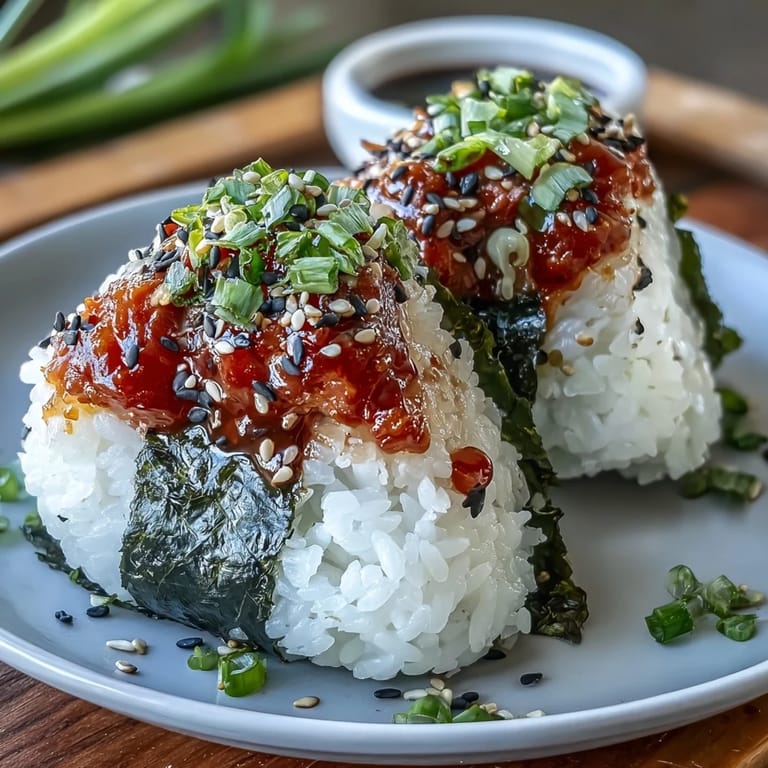
 My coworker handed me one of these during lunch last year, and I bit into it expecting something delicate—instead, the spicy tuna hit my palate like a tiny flavor explosion wrapped in seaweed. I'd always thought onigiri were meant to be simple, comforting things, but this version flipped that assumption. Now I make a batch whenever I need something that feels both impressive and sneakily easy, something I can eat with one hand while walking or pack into a bento without apology.
I made these for a picnic last summer, and watching my friends unwrap them by the water—that little moment when the nori crackles between their fingers and they taste the heat mixed with creamy mayo—reminded me that food doesn't need to be complicated to feel like you made something thoughtful. One friend came back asking for the recipe, and now she makes them every weekend.
Ingredients
- Japanese short-grain rice (2 cups): This is non-negotiable; the starch in Japanese rice makes it sticky enough to hold together without falling apart, unlike long-grain varieties.
- Water (2 1/4 cups): The ratio matters more than you'd think—too much water and your rice turns mushy, too little and you'll have crunchy bits that won't compress into a proper ball.
- Rice vinegar (1 tablespoon): This adds brightness and helps preserve the rice, plus it seasons it just enough so the filling has something to play against.
- Sugar and salt (1 teaspoon and 1/2 teaspoon): Together these balance the vinegar and make the rice taste intentional rather than just plain.
- Canned tuna in water (5 oz / 140 g) or sushi-grade raw tuna: Canned is convenient and absolutely fine; raw tuna tastes cleaner if you can get it, and that subtle difference matters when everything else is so straightforward.
- Kewpie mayonnaise (2 tablespoons): Japanese mayo has more yolk and a richer flavor than American brands—once you use it, regular mayo feels thin by comparison, though it'll work in a pinch.
- Sriracha or hot sauce (1 teaspoon): This is your heat source, so taste as you go; some bottles are friendlier than others, and you can always add more but you can't take it back.
- Soy sauce (1 teaspoon): A small amount adds umami depth without overpowering the delicate balance of flavors.
- Sesame oil (1 teaspoon): Just a touch gives the tuna mixture a toasted, complex note that makes people ask what that secret ingredient is.
- Green onion (finely chopped): This provides a sharp, fresh contrast that cuts through the richness of the mayo and heat of the Sriracha.
- Nori sheets (3 sheets, cut in half): The seaweed wraps around the bottom and adds that signature crunch plus a subtle oceanic flavor that ties everything together.
- Toasted sesame seeds (optional): A sprinkle adds texture and looks intentional, though they're truly optional if you don't have them on hand.
Tired of Takeout? 🥡
Get 10 meals you can make faster than delivery arrives. Seriously.
One email. No spam. Unsubscribe anytime.
Instructions
- Rinse and cook your rice:
- Run cold water over the rice until it runs clear—this removes excess starch so your rice grains stay separate rather than turning into paste. Cook in a rice cooker or pot according to package directions, then let it sit covered for 10 minutes to finish steaming gently.
- Season the warm rice:
- Dissolve the vinegar, sugar, and salt in a small bowl, then fold it gently into the rice while it's still warm so the grains absorb the seasoning evenly. Let it cool to room temperature before assembling; warm rice will wilt the nori and make shaping harder.
- Prepare your spicy tuna filling:
- Combine the drained tuna, Kewpie mayo, Sriracha, soy sauce, sesame oil, and chopped green onion in a bowl and stir until everything is evenly coated. Taste a tiny bit and adjust the heat level now, since it's harder to change once it's inside the rice.
- Set up your shaping station:
- Fill one small bowl with water and another with salt—you'll wet your hands in the water and dab them with salt to prevent the rice from sticking while you shape. This small step makes the whole process feel smoother and less frustrating.
- Shape each onigiri:
- Wet your hands, sprinkle them lightly with salt, and grab about 1/2 cup of cooled rice and pat it gently into a flat disk in your palm. Place 1 to 2 teaspoons of spicy tuna in the center, then fold the rice around it and gently squeeze it into a triangle, pressing just firmly enough that it holds together without crushing the filling.
- Wrap with nori and finish:
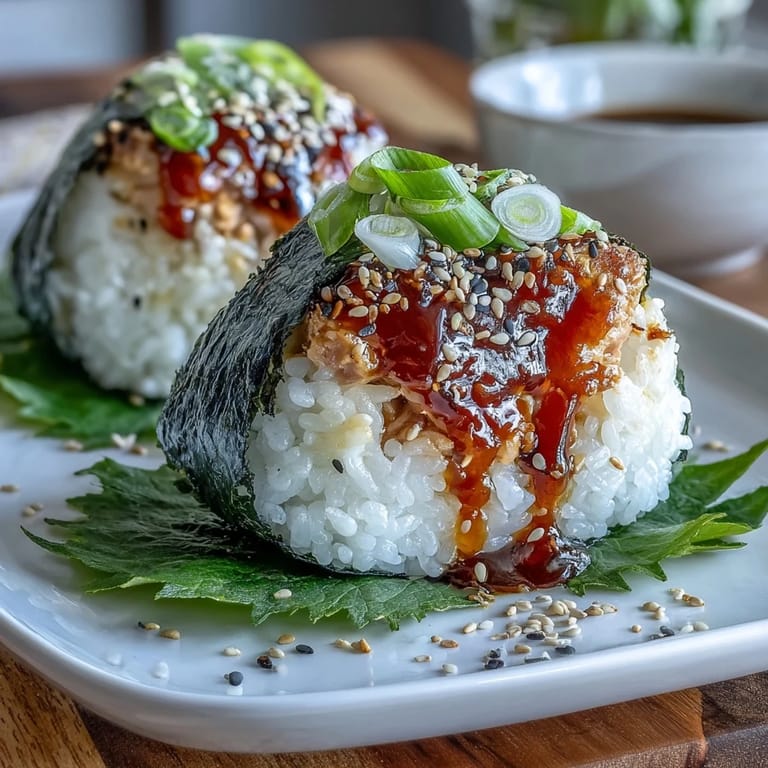
- Press a strip of nori around the bottom of each triangle—the moisture from the rice will help it stick—and sprinkle with sesame seeds if you're using them. Serve right away while the nori is still crisp, or wrap tightly in plastic wrap if you're eating them later.
 Save to Pinterest
 There's something oddly meditative about shaping these by hand, the way the rice compresses and molds around the filling. My grandmother used to say that food shaped by hand carries intention, and even though I'm not usually sentimental about cooking, there's truth to that.
The Secret to Perfect Rice
Getting the rice right is honestly 90% of this recipe's success, and it's less about following rules perfectly and more about understanding what's happening. When you rinse the rice, you're removing surface starch that would otherwise make everything gluey; when you let it rest after cooking, the residual heat finishes the job and makes it fluffier. The seasoning vinegar goes in while the rice is still warm because that's when it absorbs flavor best, and adding it to cold rice just leaves vinegary puddles at the bottom of your bowl.
Making the Filling Work for Your Taste
The spicy tuna mixture is forgiving in a way that's almost rare—if you like things hotter, add more Sriracha; if you prefer something milder, use half or skip it entirely and let the sesame oil and mayo be the main flavor. I've made versions with sriracha that could strip paint off walls and versions that are barely warm at all, and they're all good because the filling is about balance, not hitting a specific heat target. What matters is that you taste it before you fold it into the rice, because that's your only chance to adjust.
Timing and Storage Wisdom
These are best eaten within a few hours of shaping, while the nori still has that satisfying snap when you bite down. If you're making them for later, wrap each one tightly in plastic wrap and they'll stay fresh in the fridge for up to a day, though the nori will soften—which some people actually prefer because it's easier to eat without your hands getting covered in sticky rice.
- Make the tuna filling while the rice cools so everything's ready at once and you don't get bored waiting around.
- If your hands are getting too sticky while shaping, you need more salt on them, not more water.
- Sushi-grade raw tuna is worth the splurge if you can find it, but canned tuna makes these genuinely good too, and sometimes convenient is the point.
 Save to Pinterest
 These onigiri remind me that sometimes the best things come from respecting simplicity while still being a little bold. Make them once and they become the thing you reach for when you want something that feels both nourishing and exciting.
Questions & Answers
- → What type of rice is best for onigiri?
Short-grain Japanese rice is ideal for onigiri due to its sticky texture which helps the rice hold its shape.
- → Can I adjust the spice level in the tuna filling?
Yes, the heat can be toned down or intensified by varying the amount of Sriracha or substituting with milder sauces.
- → How do I prevent onigiri from drying out?
Wrapping them tightly with plastic wrap or serving soon after preparation helps retain moisture and freshness.
- → Is raw tuna necessary for the filling?
You can use canned tuna for convenience, but sushi-grade raw tuna offers a more authentic flavor and texture.
- → What is the purpose of wrapping onigiri with nori?
Nori adds a savory, slightly crisp contrast and makes the rice balls easier to handle without sticking to hands.