 Save to Pinterest
 My grandmother's kitchen in Warsaw always smelled like butter and caramelized onions on Thursday nights, when she'd teach me to fold pierogi with the precision of someone who'd made thousands. I was maybe twelve, all elbows and impatience, but the moment I bit into one—that tender dough giving way to creamy potato and melted cheese—I understood why she'd devoted entire afternoons to these little pockets of comfort. Now, whenever I make them, I'm transported back to her floury hands gently correcting mine, showing me the exact pinch needed to seal each one.
I made these for a dinner party once when I was trying to impress a new friend who'd never had authentic Polish food, and watching her face light up after that first bite was better than any compliment I've ever received. She asked for the recipe that night, and now she calls to tell me when she's made a batch—that's when I knew I'd gotten it right.
Ingredients
- All-purpose flour: The foundation of everything—it needs to be measured by weight if possible, because scooping straight from the bag can pack it down and throw off your dough ratio.
- Lukewarm water: Hot water will cook the egg before you can even mix it; lukewarm is the sweet spot that lets everything come together smoothly.
- Sour cream: This is the secret that makes the dough tender and slightly tangy in the best way—don't skip it or substitute.
- Russet potatoes: They're starchy and mash to a cloud; waxy potatoes will leave you with a grainy, disappointing filling.
- Farmers cheese or ricotta: The filling needs that creamy richness and slight tang; cottage cheese works but drain it very thoroughly or your pierogi will be watery.
- Sharp cheddar: A little goes a long way, and sharp varieties have more flavor than mild—you want every bite to taste like something special.
Tired of Takeout? 🥡
Get 10 meals you can make faster than delivery arrives. Seriously.
One email. No spam. Unsubscribe anytime.
Instructions
- Mix and knead the dough:
- Combine flour and salt in a large bowl, then create a well in the center like you're cradling something precious. Add your egg, melted butter, sour cream, and water all together, and start stirring with a wooden spoon until it's shaggy and rough. Transfer to a floured counter and knead for five to seven minutes—you'll feel the dough transform under your hands from sticky to smooth and elastic, almost like it's alive.
- Let it rest:
- Cover the dough with a damp towel and let it sit for thirty minutes while you make the filling. This resting time matters more than you'd think; it relaxes the gluten and makes rolling infinitely easier.
- Cook and mash the potatoes:
- Boil cubed russet potatoes in salted water until a fork slides through them without resistance, usually fifteen to eighteen minutes. Drain them thoroughly—any excess water will make your filling soggy—then mash until completely smooth with no lumps.
- Sauté the onion:
- In a skillet, melt two tablespoons of butter over medium heat and cook finely chopped onion slowly until it's deep golden and sweet-smelling, about five minutes. This cooked onion is what gives the filling its subtle savory depth.
- Combine the filling:
- Mix the mashed potatoes with the sautéed onion, farmers cheese, and sharp cheddar while everything is still warm. Taste it, season generously with salt and pepper, then let it cool completely before filling—warm filling will make the dough soggy and impossible to seal.
- Roll and cut the dough:
- On a floured surface, roll the rested dough to about one-eighth inch thickness—thinner than you probably think, but this is what gives you that tender bite. Cut circles about three inches wide using a round cutter or the rim of a glass, and gather the scraps to reroll.
- Fill and seal:
- Place one heaping teaspoon of filling in the center of each circle, fold in half, and pinch the curved edge firmly so it's completely sealed. Place filled pierogi under a towel so the dough doesn't dry out while you work through them all.
- Boil gently:
- Bring a large pot of salted water to a gentle boil—not a rolling boil, which will batter the delicate dumplings. Add pierogi in batches so they have room to float freely, and when they rise to the surface, cook for another one to two minutes, then lift out with a slotted spoon.
- Make the caramelized onions:
- In a large skillet, melt three tablespoons of butter over medium-low heat and add thinly sliced onions. Cook low and slow, stirring often, for twenty to twenty-five minutes until they're deeply golden, sweet, and almost jammy—rushing this step ruins the whole thing.
- Pan-fry until crisp:
- In the same skillet with all those onion drippings, add boiled pierogi in batches and fry on both sides until they're golden and just slightly crispy on the outside, about two to three minutes per side. Don't crowd the pan or they'll steam instead of fry.
 Save to Pinterest
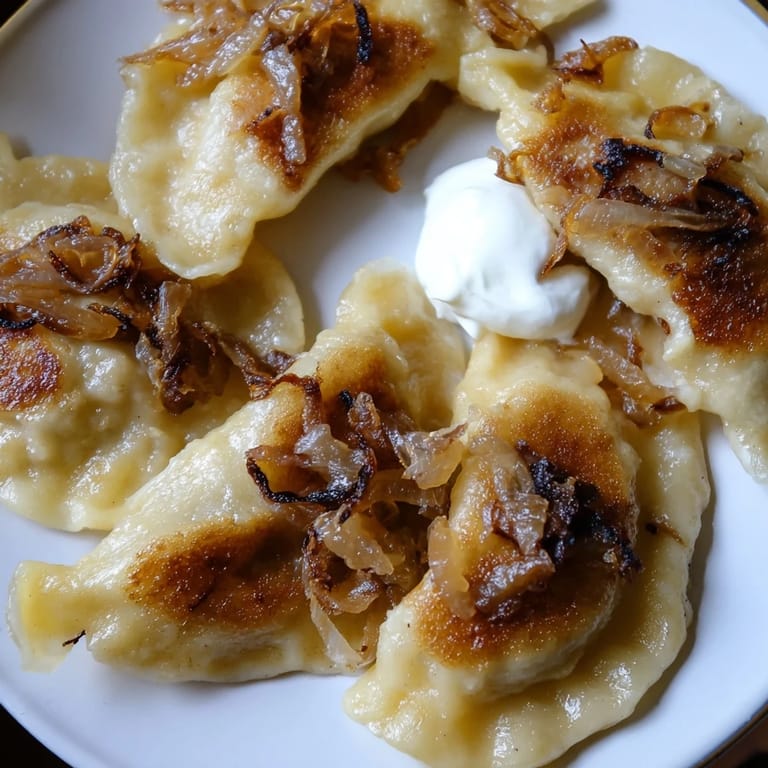
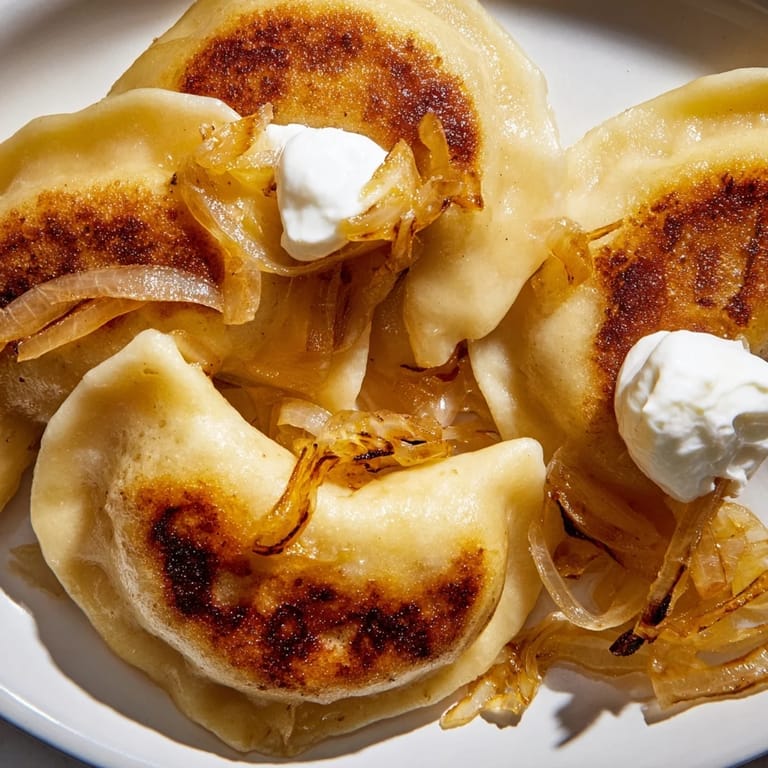
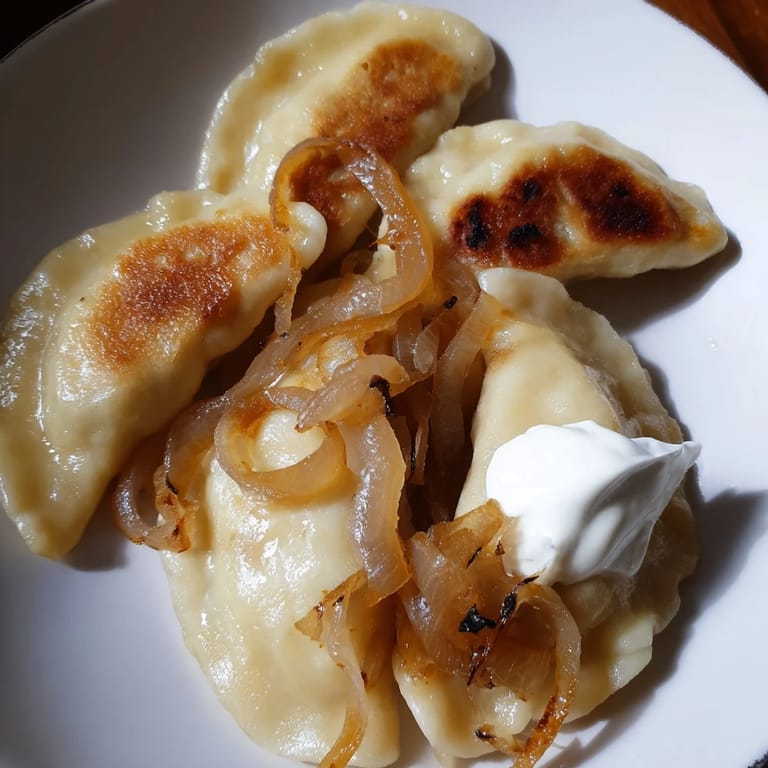
 There's something almost meditative about standing at the stove, folding dough over filling again and again, your hands falling into a rhythm that feels older than memory. By the time you're serving them—golden and steaming, crowned with those dark, sweet onions and a dollop of cool sour cream—you understand that some foods are made to slow you down.
Freezing and Make-Ahead Magic
One of the greatest gifts of pierogi is that they freeze beautifully uncooked, which means you can spend an afternoon folding a big batch, then have homemade dinner ready in the time it takes to boil water for the next month. Lay uncooked pierogi on a parchment-lined tray, freeze until solid, then transfer to freezer bags where they'll keep for two months. You don't even need to thaw them—just drop frozen pierogi directly into boiling water and cook for an extra minute or two.
Cheese and Filling Variations
While the potato and cheese combination is classic for good reason, I've found that farmers cheese and sharp cheddar is the magic pairing—it's creamy without being heavy, and the cheddar gives a subtle sharpness that keeps the filling from tasting one-note. If you can't find farmers cheese, well-drained cottage cheese works in a pinch, though you need to drain it almost aggressively in a fine-mesh sieve for at least ten minutes. Some people love a mix of cheese—some cheddar, some gruyère—and I won't argue with that.
Serving Suggestions and Pairings
Pierogi are honestly perfect on their own with caramelized onions and sour cream, but they're also wonderfully flexible for whatever you're craving. Crisp Polish lager is the traditional pairing, though a dry white wine like Sauvignon Blanc or even a light pilsner works beautifully. If you want to make them a full meal, serve alongside a simple green salad or a bowl of beet soup, and if you're feeling adventurous, you can add crispy bacon lardons to the onions or even a fried egg on top.
- Make them ahead and reheat gently in a skillet with a bit of butter for weeknight dinners that taste like you spent all day cooking.
- Leftover caramelized onions are incredible on burgers, sandwiches, or stirred into soups for extra depth.
- If you have any boiled pierogi left unfried, store them in an airtight container and pan-fry them the next day—they taste even better the second time around.
 Save to Pinterest
 Making pierogi is one of those recipes that tastes like it took all day but actually rewards you for your effort in the best way possible. Once you've made a batch, you'll understand why my grandmother spent Thursday nights this way.
Questions & Answers
- → What type of cheese works best for pierogi filling?
Farmers cheese or well-drained ricotta combined with sharp cheddar creates a creamy and flavorful filling with a balanced texture.
- → How do I prevent pierogi from sticking during boiling?
Use plenty of salted water and gently stir occasionally. Remove pierogi as soon as they float and cook for an additional 1-2 minutes.
- → What is the best way to caramelize onions for topping?
Cook thinly sliced onions slowly over medium-low heat in butter, stirring often until deeply golden and sweet, about 20-25 minutes.
- → Can pierogi be frozen before cooking?
Yes, freeze uncooked pierogi on a tray first, then transfer to bags. They keep well for up to two months.
- → How thick should the dough be rolled out?
Roll the dough to about ⅛-inch (3 mm) thickness for a tender yet sturdy wrapper that cooks evenly.