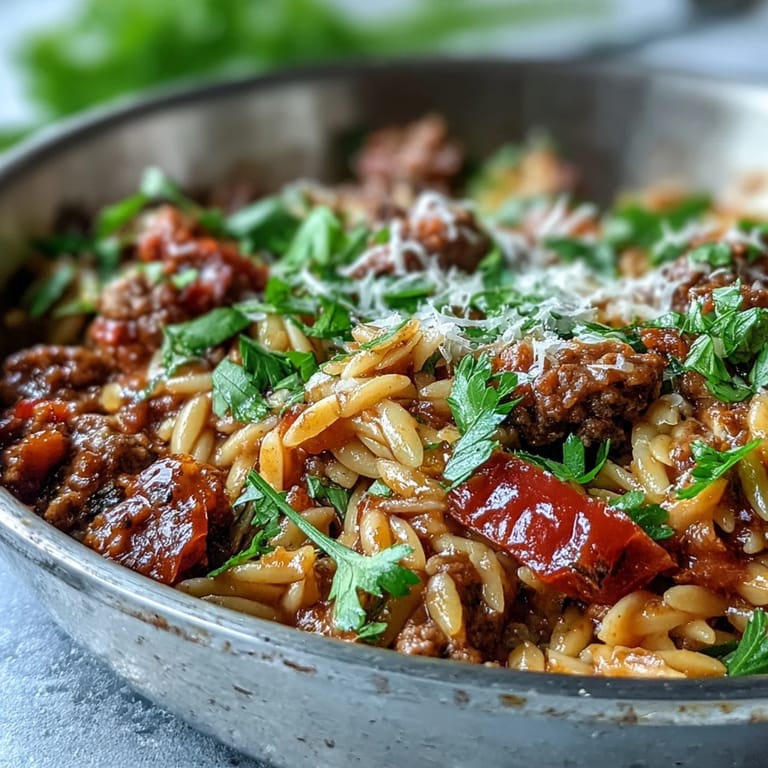
 Save to Pinterest
 One evening, I stood at the stove stirring a skillet while my sister sat at the counter complaining about her long day. I wasn't planning anything elaborate, just tossing what I had into one pan. The smell of browning beef and sweet peppers filled the kitchen, and by the time I folded in the orzo, she'd stopped talking and started watching. We ended up eating straight from the skillet, bowls abandoned, laughing at how something so simple could feel this good.
I started making this after a neighbor brought over a version during a particularly hectic week. I scribbled down what I remembered and tried it myself, tweaking the herbs and adding more Parmesan than she probably would have approved of. Now it's my go to when I want something warm and filling without a long ingredient list or complicated steps.
Ingredients
- 1 pound ground beef: Choose beef with a bit of fat for flavor, but drain any excess after browning so the dish doesn't feel greasy.
- 1 cup orzo pasta: This tiny rice shaped pasta absorbs the broth beautifully and cooks right in the skillet, no separate pot needed.
- 1 medium onion, finely chopped: A finely chopped onion melts into the sauce and adds sweetness without overwhelming the other flavors.
- 1 bell pepper (red or green), diced: Red peppers are slightly sweeter, green ones add a bit of bite, use whichever you prefer or have on hand.
- 1 can (14.5 ounces) diced tomatoes, with juice: The juice is essential, it becomes part of the cooking liquid and gives the orzo a rich tomato flavor.
- 1 cup frozen peas: Frozen peas are convenient and add a pop of color and sweetness at the end without any prep work.
- Fresh parsley, chopped (for garnish): A handful of fresh parsley brightens the whole dish and makes it look like you put in extra effort.
- 2 cloves garlic, minced: Fresh garlic is worth the minute it takes to mince, it blooms in the oil and infuses everything with warmth.
- 2 cups beef broth: Use a good quality broth if you can, it's the backbone of the sauce and makes a noticeable difference.
- 1 teaspoon dried oregano: Oregano brings an earthy, slightly peppery note that pairs perfectly with tomatoes and beef.
- 1 teaspoon dried basil: Basil adds a hint of sweetness and rounds out the Italian inspired flavor without needing fresh herbs.
- 1/2 teaspoon salt: Start with this amount and taste before serving, you can always add more depending on your broth's saltiness.
- 1/4 teaspoon black pepper: Just enough pepper to add a subtle kick without making the dish spicy.
- 1/4 cup grated Parmesan cheese: Stir it in at the end for a salty, nutty richness that ties everything together.
- 2 tablespoons olive oil: Olive oil helps the onions and garlic soften without sticking and adds a gentle fruity flavor to the base.
Tired of Takeout? 🥡
Get 10 meals you can make faster than delivery arrives. Seriously.
One email. No spam. Unsubscribe anytime.
Instructions
- Start with the aromatics:
- Heat the olive oil in your skillet over medium heat, then add the chopped onion and let it cook until it turns soft and translucent, about 3 to 4 minutes. You'll know it's ready when the kitchen smells sweet and the onion pieces look almost see through.
- Add garlic and pepper:
- Stir in the minced garlic and diced bell pepper, cooking for another 2 to 3 minutes until the pepper starts to soften and the garlic becomes fragrant. Keep stirring so the garlic doesn't burn, it can go from golden to bitter in seconds.
- Brown the beef:
- Turn the heat up to medium high and add the ground beef, breaking it apart with your spatula as it cooks. Let it brown for 5 to 7 minutes, then drain off any excess fat if there's more than a tablespoon or so pooling in the pan.
- Build the sauce:
- Pour in the diced tomatoes with their juice, beef broth, oregano, basil, salt, and black pepper, stirring everything together. The skillet will look full and a little messy, but that's exactly right.
- Simmer to blend flavors:
- Bring the mixture to a boil, then lower the heat to medium low and let it simmer for 10 minutes. This gives the spices time to bloom and the tomatoes time to break down into the broth.
- Cook the orzo:
- Add the orzo, stirring it into the liquid, then cover the skillet and let it cook for 10 to 12 minutes. Stir occasionally to keep the pasta from sticking to the bottom, and watch as it plumps up and absorbs all that savory broth.
- Fold in the peas:
- Once the orzo is tender and most of the liquid is gone, stir in the frozen peas and cook for another 2 to 3 minutes. They'll heat through quickly and add little bursts of sweetness to every bite.
- Finish with cheese:
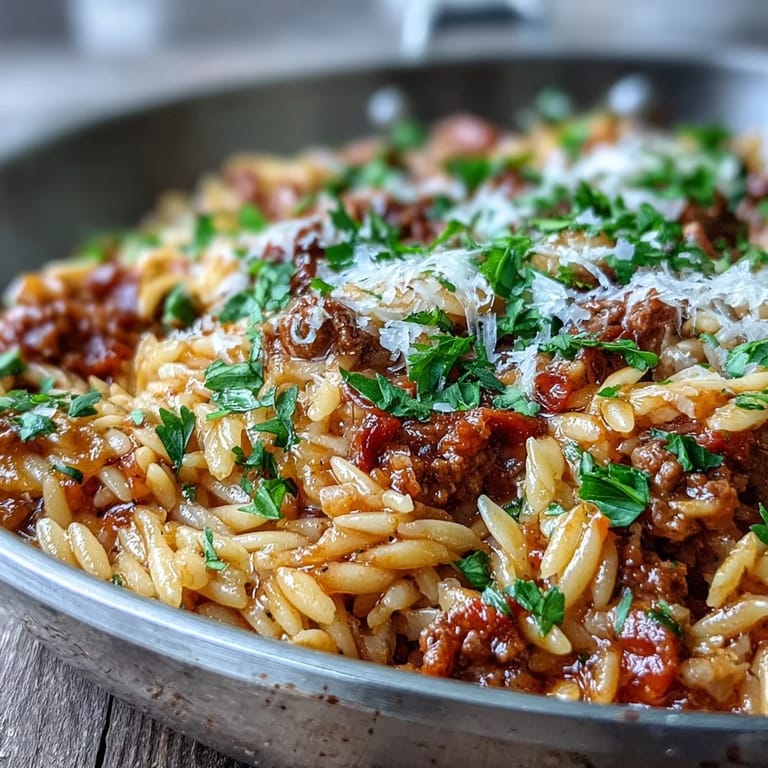
- Take the skillet off the heat and stir in the grated Parmesan until it melts and coats everything in a creamy, salty layer. Taste and adjust the seasoning if needed, then serve hot with a sprinkle of fresh parsley on top.
 Save to Pinterest
 The first time I made this for my partner, he came into the kitchen halfway through and asked if I was making something special. I wasn't, but the way the Parmesan melted into the orzo made it look like I'd been cooking all day. We sat on the couch with our bowls, and he went back for seconds without saying a word, which is his version of high praise.
How to Store and Reheat
Leftovers keep in an airtight container in the fridge for up to three days, and they actually taste even better the next day once the flavors have had time to meld. Reheat gently on the stovetop with a splash of broth or water to loosen the orzo, or microwave in short intervals, stirring in between. The orzo will soak up more liquid as it sits, so don't worry if it looks a little dry at first, a little extra moisture brings it right back.
Swaps and Substitutions
Ground turkey or chicken works beautifully if you want something leaner, just season a bit more generously since they're milder than beef. You can swap the orzo for small shells or ditalini if that's what you have, though the cooking time might vary slightly. If you're out of Parmesan, a handful of shredded mozzarella or cheddar melts in just as well and adds a different kind of richness.
Ways to Make It Your Own
I've tossed in handfuls of spinach, diced zucchini, and sliced mushrooms depending on what's in the crisper, and they all disappear into the dish without fuss. A pinch of red pepper flakes gives it a gentle heat, and a splash of cream stirred in at the end makes it feel more indulgent. Fresh thyme or rosemary in place of the dried herbs changes the whole vibe, turning it a little more earthy and rustic.
- Stir in a handful of fresh spinach during the last few minutes for extra greens without altering the flavor.
- Top each serving with a dollop of ricotta or a drizzle of good olive oil for a touch of luxury.
- Use fire roasted tomatoes instead of regular diced ones to add a subtle smoky depth.
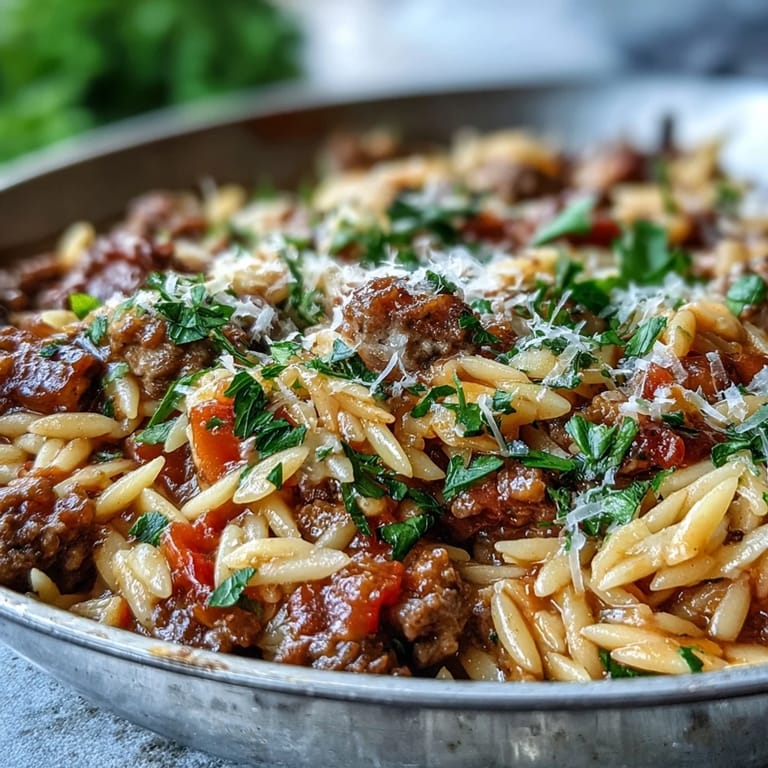 Save to Pinterest
 This is the kind of recipe that earns its place in your regular rotation without trying too hard. It's comfort in a skillet, ready when you are, and generous enough to share or keep all to yourself.
Questions & Answers
- → Can I substitute the ground beef with another protein?
Yes, ground turkey or chicken work wonderfully as leaner alternatives. You can also use ground pork or Italian sausage for a different flavor profile.
- → What can I use instead of orzo pasta?
Small pasta shapes like ditalini, acini de pepe, or small shells make excellent substitutes. Adjust cooking time as needed based on package instructions.
- → How do I prevent the orzo from sticking?
Stir occasionally during cooking and ensure there's enough liquid in the skillet. If it begins to stick, add a splash of broth or water and reduce heat slightly.
- → Can I make this ahead of time?
Absolutely. Prepare the dish fully and store in an airtight container for up to 3 days. Reheat on the stovetop with a splash of broth to restore moisture.
- → What vegetables work well in this dish?
Spinach, zucchini, mushrooms, or carrots are excellent additions. Add heartier vegetables with the bell peppers and tender greens near the end of cooking.
- → Can I freeze leftovers?
Yes, though orzo may soften slightly upon reheating. Store in freezer-safe containers for up to 2 months and thaw overnight in the refrigerator before reheating.