 Save to Pinterest
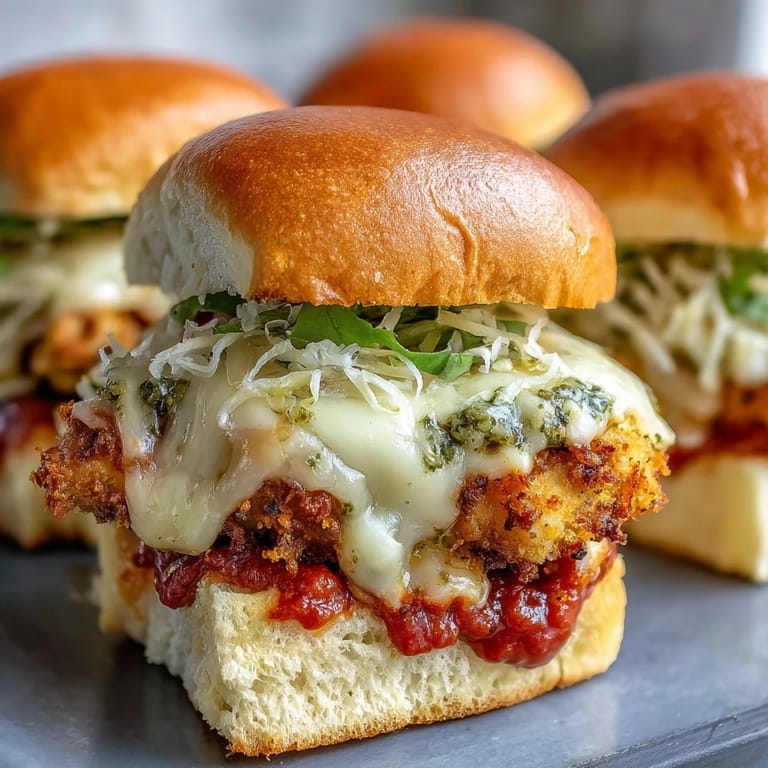
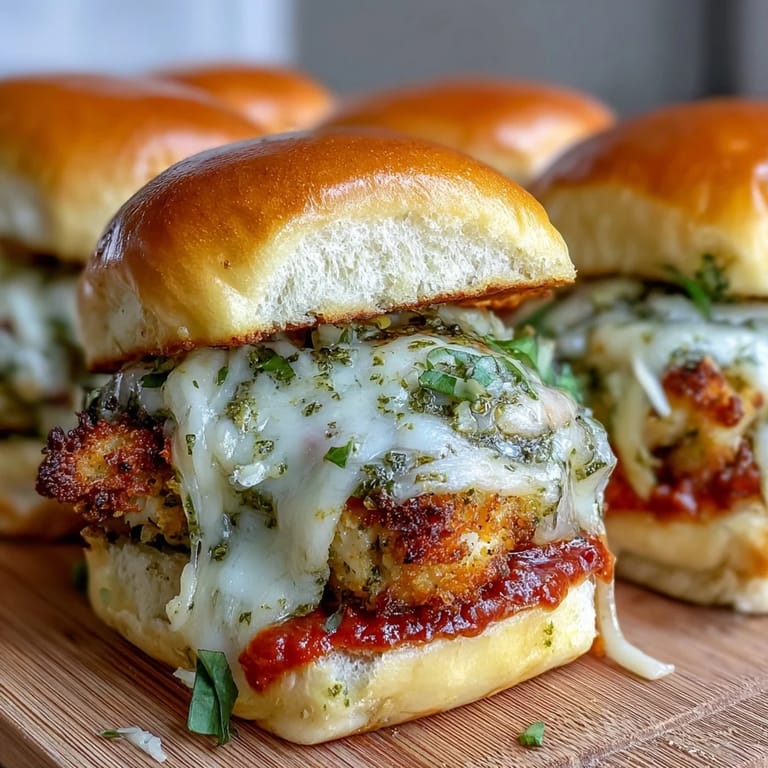
 My cousin texted me at 3 PM on a Saturday asking if I could bring something to her housewarming in two hours. I stood in my kitchen, slightly panicked, scrolling through my phone when I spotted mini brioche buns at the store near my house. That's when it clicked—pesto chicken Parmesan sliders. They sounded fancy enough to impress, but simple enough that I wouldn't stress. What started as a last-minute scramble became the dish everyone asked me to make again.
I made these for my daughter's soccer team after-party last spring, and watching a bunch of hungry teenagers devour a whole tray in under five minutes told me everything I needed to know. One kid came back for seconds and asked what was in the pesto—he'd never had anything like it before. That's the magic of these sliders: they bridge the gap between what people expect and what actually tastes incredible.
Ingredients
- Boneless, skinless chicken breasts (2 large, about 500 g): Cut these into 12 roughly equal pieces so they cook evenly and fit nicely inside the buns; thinner pieces mean they'll be tender inside without drying out.
- Olive oil (2 tbsp): This keeps the chicken moist while the panko does its job creating that golden crust.
- Garlic powder, salt, and black pepper: Simple seasoning that lets the pesto and marinara shine without overpowering them.
- Panko breadcrumbs (1 cup/60 g): Panko stays crunchier than regular breadcrumbs, and that texture is what makes people say wow when they bite in.
- Grated Parmesan cheese (1/2 cup/50 g): This adds a savory punch to the breading and helps it brown beautifully in the oven.
- Dried Italian herbs (1 tsp): These blend into the panko coating and tie the whole Italian-American vibe together.
- Mini brioche slider buns (12): Brioche has just enough sweetness to balance the savory pesto and marinara—don't skip this for regular buns.
- Basil pesto (1/2 cup/120 ml): Spread it on the bottom bun before adding chicken so it doesn't slide around and flavors the whole bite.
- Marinara sauce (1 cup/240 ml): A light hand here keeps things from getting soggy; one tablespoon per slider is the sweet spot.
- Shredded mozzarella cheese (1 1/2 cups/150 g): Fresh or store-bought works fine, but shred it yourself if you want it to melt more evenly.
- Unsalted butter, melted (2 tbsp): Brushed on top of the buns before the final bake gives them a golden, almost crispy edge.
- Fresh parsley (1 tbsp, optional): A sprinkle on top is the final touch that makes these look homemade in the best way.
Tired of Takeout? 🥡
Get 10 meals you can make faster than delivery arrives. Seriously.
One email. No spam. Unsubscribe anytime.
Instructions
- Set your oven to 400°F and prep your workspace:
- Line a baking sheet with parchment paper so cleanup is easier and nothing sticks. Having everything ready before you start means less running around once the chicken hits the heat.
- Season and oil your chicken pieces:
- In a bowl, toss the 12 chicken pieces with 2 tablespoons of olive oil, garlic powder, salt, and pepper until each piece is evenly coated. This step takes a minute but ensures every bite has flavor baked in.
- Bread each piece until it's coated:
- Mix panko, Parmesan, and Italian herbs in a shallow dish, then press each chicken piece into the mixture, making sure it sticks on all sides. The Parmesan will help it brown and adds a savory crust.
- Bake the chicken until golden and cooked through:
- Arrange breaded pieces on your lined baking sheet and bake for 15 to 18 minutes until the coating is golden and the meat is no longer pink inside. You'll smell the Parmesan getting toasty and know you're on the right track.
- Prepare your buns while chicken cooks:
- Slice your 12 mini brioche buns in half and spread about 2 teaspoons of basil pesto on each bottom half. This spreads the pesto flavor throughout and prevents it from sliding off when you add the chicken.
- Build each slider with precision:
- Once chicken is done, place one piece on each pesto-covered bottom bun, then spoon 1 tablespoon of marinara over the chicken. Top with a generous pinch of shredded mozzarella so it melts evenly.
- Crown your sliders and brush with butter:
- Place the top bun on each slider and arrange them in a baking dish. Brush melted butter over all the tops for that golden finish.
- Final bake to melt the cheese:
- Bake for 5 minutes at 400°F until the cheese is fully melted and the buns are slightly toasted on top. Watch them because brioche browns fast.
- Garnish and serve while warm:
- Sprinkle chopped fresh parsley over the top if you want that restaurant touch, then serve immediately while everything is still warm and the cheese is stretchy.
 Save to Pinterest
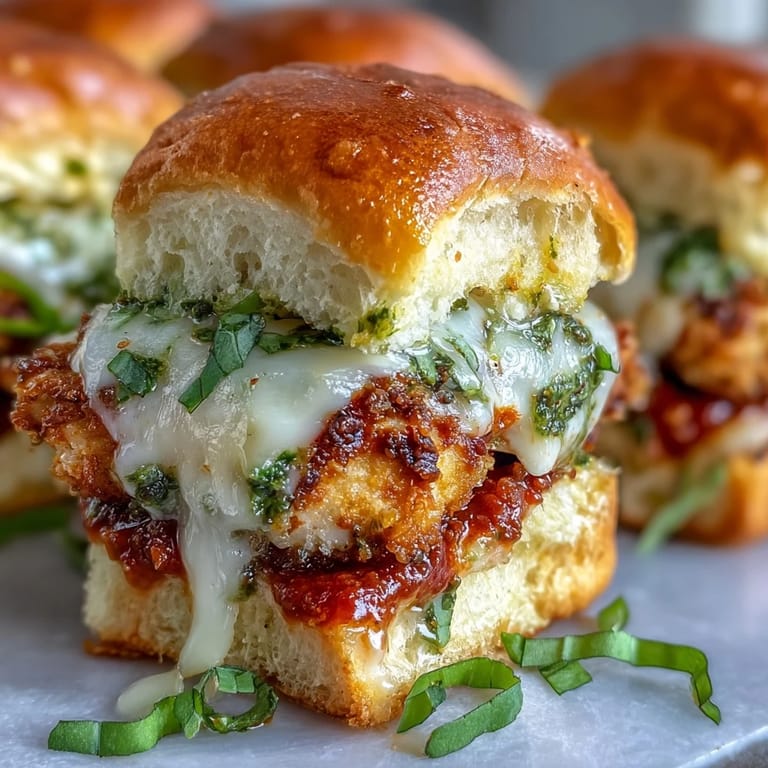
 My neighbor stopped by right as I was pulling these out of the oven, and the smell of melted mozzarella mixed with basil pesto hit her before I even opened the door. She asked to buy a slider, which made me laugh, but it also made me realize these aren't just appetizers—they're little moments of comfort food that people actually crave.
Shortcuts That Actually Work
When life gets hectic, you don't need to abandon this recipe—you just adapt it. I've used rotisserie chicken shredded and tossed with pesto instead of breading and baking, which cuts your active cooking time in half. The sliders still taste amazing, and nobody at the table knows you didn't pound and bread each piece yourself. Sometimes taking the shortcut doesn't mean sacrificing quality; it just means being smart about your energy.
Cheese Swaps and Flavor Shifts
Mozzarella is the classic choice because it melts like a dream, but I've experimented with provolone and fontina when I had them on hand. Provolone brings an earthier flavor that plays beautifully with the pesto, while fontina adds a subtle nutty richness. The marinara and pesto are strong enough that they carry any cheese you choose, so don't feel locked into one option.
Making These Your Own
The foundation of these sliders is sturdy enough that you can play with it. I've added a thin slice of roasted red pepper between the chicken and sauce, used sun-dried tomato pesto instead of basil, and even added a small piece of prosciutto for richness. What matters is that you're combining something creamy (the cheese), something bright (the pesto), something tangy (the marinara), and something textured (the panko chicken) in one small bite.
- Serve with extra marinara on the side for dipping if your guests like saucy bites.
- Make the chicken pieces and bread them a few hours ahead, then bake them right before assembly to save time.
- These reheat beautifully wrapped in foil at 350°F, so they're perfect for meal prep if you're feeding a crowd the next day.
 Save to Pinterest
 These sliders taught me that sometimes the best dishes are the ones you make because you're in a pinch, not because you planned it weeks ahead. There's something about throwing something together with whatever you have that makes it taste even better when people enjoy it.
Questions & Answers
- → Can I prepare these sliders ahead of time?
Yes, you can bread and bake the chicken up to a day in advance. Store refrigerated and assemble with pesto, marinara, and cheese just before the final baking step.
- → What's the best way to reheat leftover sliders?
Reheat in a 350°F oven for 5-7 minutes to maintain crispiness. Microwaving will make the buns soggy and the chicken lose its crunch.
- → Can I use store-bought rotisserie chicken?
Absolutely. Skip the breading step and toss shredded rotisserie chicken with pesto before assembling. This reduces prep time to about 10 minutes.
- → What sides pair well with these sliders?
Serve with a simple green salad, garlic knots, or roasted vegetables. Extra marinara on the side makes for great dipping.
- → How do I store leftovers?
Keep assembled sliders in an airtight container in the refrigerator for up to 3 days. The buns may soften, but reheating in the oven helps restore some texture.
- → Can I make these gluten-free?
Use gluten-free slider buns and substitute panko with gluten-free breadcrumbs. Ensure your pesto and marinara are certified gluten-free as well.