 Save to Pinterest
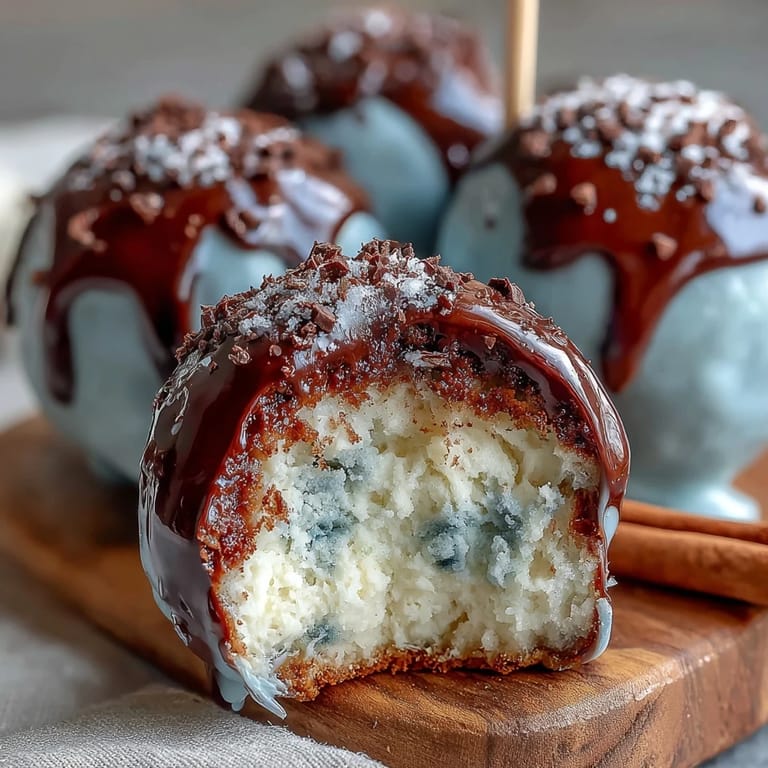
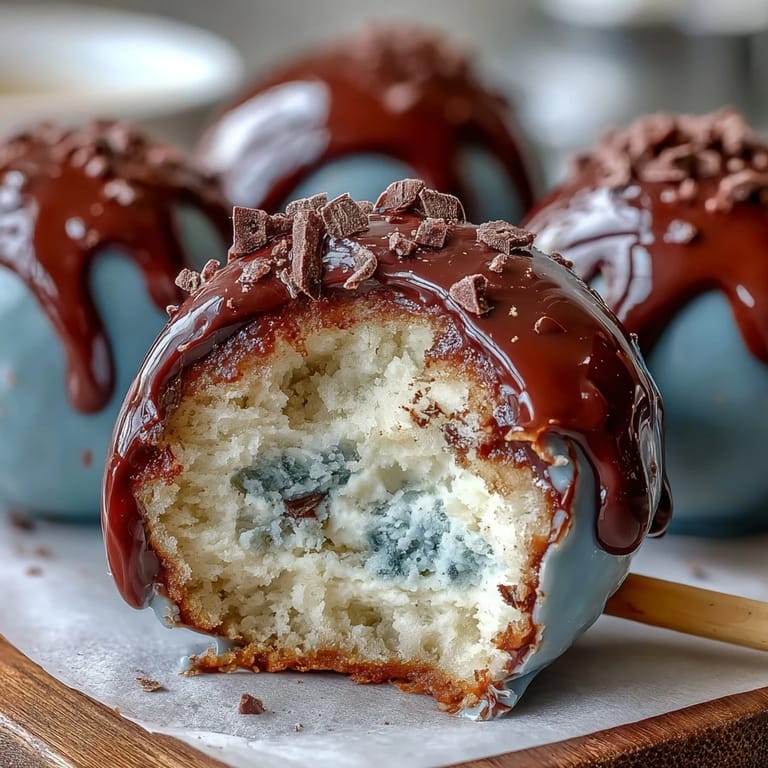
 These enchanting Robins Egg Blue Cake Pops bring the whimsy of spring right to your dessert table. With their delicate speckled coating mimicking the beauty of real robins' eggs, each bite-sized treat is a celebration of the season. Perfect for Easter gatherings, baby showers, or any spring celebration, these cake pops combine moist vanilla cake with creamy frosting, all wrapped in a smooth candy shell that's as delightful to look at as it is to eat.
Save to Pinterest The magic of these cake pops lies in the artistry of creating that signature speckled effect. While the process requires a bit of patience, the stunning results are absolutely worth it. The combination of tender cake crumbs bound with silky frosting creates the perfect texture, while the white chocolate coating tinted to that perfect robin's egg blue becomes your canvas for edible art.
Ingredients
Tired of Takeout? 🥡
Get 10 meals you can make faster than delivery arrives. Seriously.
One email. No spam. Unsubscribe anytime.
- Cake: 1 box vanilla cake mix (or homemade equivalent), plus ingredients as required by cake mix (typically eggs, oil, water)
- Frosting: 1/2 cup (115 g) unsalted butter, softened; 1 1/2 cups (180 g) powdered sugar; 2 tbsp (30 ml) milk; 1 tsp vanilla extract
- Coating: 12 oz (340 g) white candy melts or white chocolate; blue gel food coloring (preferably oil-based for chocolate); 2 tbsp (28 g) coconut oil or vegetable shortening (optional, for thinning)
- Decoration: 1 tbsp (15 g) cocoa powder; 1–2 tsp vodka or clear extract (for speckling); edible gold or silver luster dust (optional)
- Assembly: 24 lollipop sticks; Styrofoam block or cake pop stand
Instructions
- Step 1: Bake the Cake
- Preheat oven and bake the vanilla cake according to package or recipe instructions. Let the cake cool completely.
- Step 2: Prepare the Frosting
- In a medium bowl, cream the butter, then gradually beat in powdered sugar, milk, and vanilla extract until smooth to make the frosting.
- Step 3: Form the Cake Mixture
- Crumble the cooled cake into fine crumbs in a large bowl. Add frosting a little at a time, mixing with your hands until the mixture holds together but is not too sticky (you may not need all the frosting).
- Step 4: Shape the Cake Balls
- Roll the mixture into 24 even balls, about 1 tablespoon each. Place on a parchment-lined baking sheet. Freeze for 15 minutes to firm up.
- Step 5: Prepare the Coating
- Melt the white candy melts or white chocolate in a heatproof bowl set over simmering water or in the microwave in 20-second intervals, stirring until smooth. Tint with blue gel food coloring to achieve a robins egg blue shade. Add coconut oil or shortening to thin if needed.
- Step 6: Insert the Sticks
- Dip the tip of each lollipop stick into the melted coating, then insert it halfway into a cake ball. Repeat for all balls, then refrigerate for 10 minutes to secure.
- Step 7: Coat the Cake Pops
- Fully dip each cake pop into the blue coating, letting excess drip off. Stand upright in a Styrofoam block or cake pop stand to set.
- Step 8: Add the Speckles
- For the speckled effect, mix cocoa powder with vodka or extract to form a thin paste. Dip a clean brush in the mixture and flick it gently over the cake pops to create speckles. Optionally, add luster dust for extra shine.
- Step 9: Final Setting
- Allow cake pops to set completely before serving.
Zusatztipps für die Zubereitung
Temperature control is crucial when working with candy melts and chocolate. If your coating becomes too thick, add a small amount of coconut oil or vegetable shortening to achieve the right consistency. Use oil-based food coloring to prevent chocolate from seizing. When creating the speckled effect, practice your flicking technique on parchment paper first to get comfortable with the motion. The vodka or extract helps the cocoa powder adhere while evaporating quickly, leaving only the speckles behind. Work quickly but carefully when dipping to ensure an even coat. Store cake pops at room temperature for up to 3 days or refrigerate for up to a week.
Varianten und Anpassungen
Try lemon or almond extract in the frosting for a flavor twist that adds a bright, sophisticated note to these festive treats. For gluten-free guests, use a gluten-free cake mix and ensure all other ingredients are certified gluten-free. You can also experiment with different cake flavors like chocolate or red velvet while maintaining the signature blue coating. For a different color scheme, adjust the food coloring to create pastel pink, lavender, or mint green variations perfect for different spring celebrations or color-coordinated party themes.
Serviervorschläge
Display these beautiful cake pops on a tiered stand for maximum visual impact at your dessert table. They make stunning centerpieces when arranged in decorative containers filled with faux grass or pastel tissue paper. Pair them with other spring-themed treats like sugar cookies, macarons, or fresh fruit for a complete dessert spread. These cake pops are also perfect as party favors when individually wrapped in clear cellophane bags tied with coordinating ribbon. For an Easter brunch, serve them alongside coffee and tea for a delightful sweet finish to the meal.
 Save to Pinterest
 These Robins Egg Blue Cake Pops are more than just a dessert—they're edible art that captures the essence of spring. Whether you're hosting an Easter celebration, planning a baby shower, or simply want to bring a touch of seasonal joy to your table, these charming treats deliver both in presentation and flavor. With a little patience and creativity, you'll create stunning confections that will have everyone reaching for seconds and asking for the recipe.
Questions & Answers
- → How do I achieve the robins egg blue color?
Use oil-based blue gel food coloring mixed into melted white chocolate or candy melts to get a smooth, vibrant robins egg blue shade.
- → What’s the best way to make the speckled effect?
Mix cocoa powder with a small amount of vodka or clear extract to create a thin paste, then flick it gently over coated treats using a food-safe brush.
- → Can I use gluten-free cake mix for this?
Yes, substitute with a gluten-free cake mix and confirm all other ingredients are gluten-free for a suitable variation.
- → How should these treats be stored?
They can be stored at room temperature for up to 3 days or refrigerated for about a week to maintain freshness.
- → What can I use to thin the coating if needed?
Add a small amount of coconut oil or vegetable shortening to the melted coating to achieve the desired consistency for dipping.